Databases
Review and correct your machines' stop, production, operator and defect records, shift by shift, in Databases.
Databases, in the left-hand menu, holds your plant's records in four tabs: Stops, Production, Operators and Defects. Each lists one row per stop or per machine and shift, for the period and machines you choose, and lets you correct what was recorded: the quantity produced, the SKU, the operator on a shift, the defects.
Choose the period and the machines
These two selectors, at the top right, are the same on every tab:
- The date range. Click it and pick the start and end dates on the calendar, up to 15 days. Under Shift, untick any shifts you don't want to see, then click Apply.
- Machines chooses which machines are listed.
Each tab's table shows records still in progress with Live as their end time, and a shift that ends the next day with (+1). Click a column heading to sort by it. Download downloads the records listed.
Stops
The Stops tab lists every stop, where you classify, split and filter them. It has its own guide: Stops.
Production
The Production tab lists what each machine produced in each shift: Machine, Date, Shift, Start Time, End Time, Operator, Quantity, SKU, Nominal speed p/h, Production Order and Type, followed by any custom fields you've added and Actions. The chip icon next to a machine's name means its production is counted automatically: hover over it to see "This advancement is automatized."
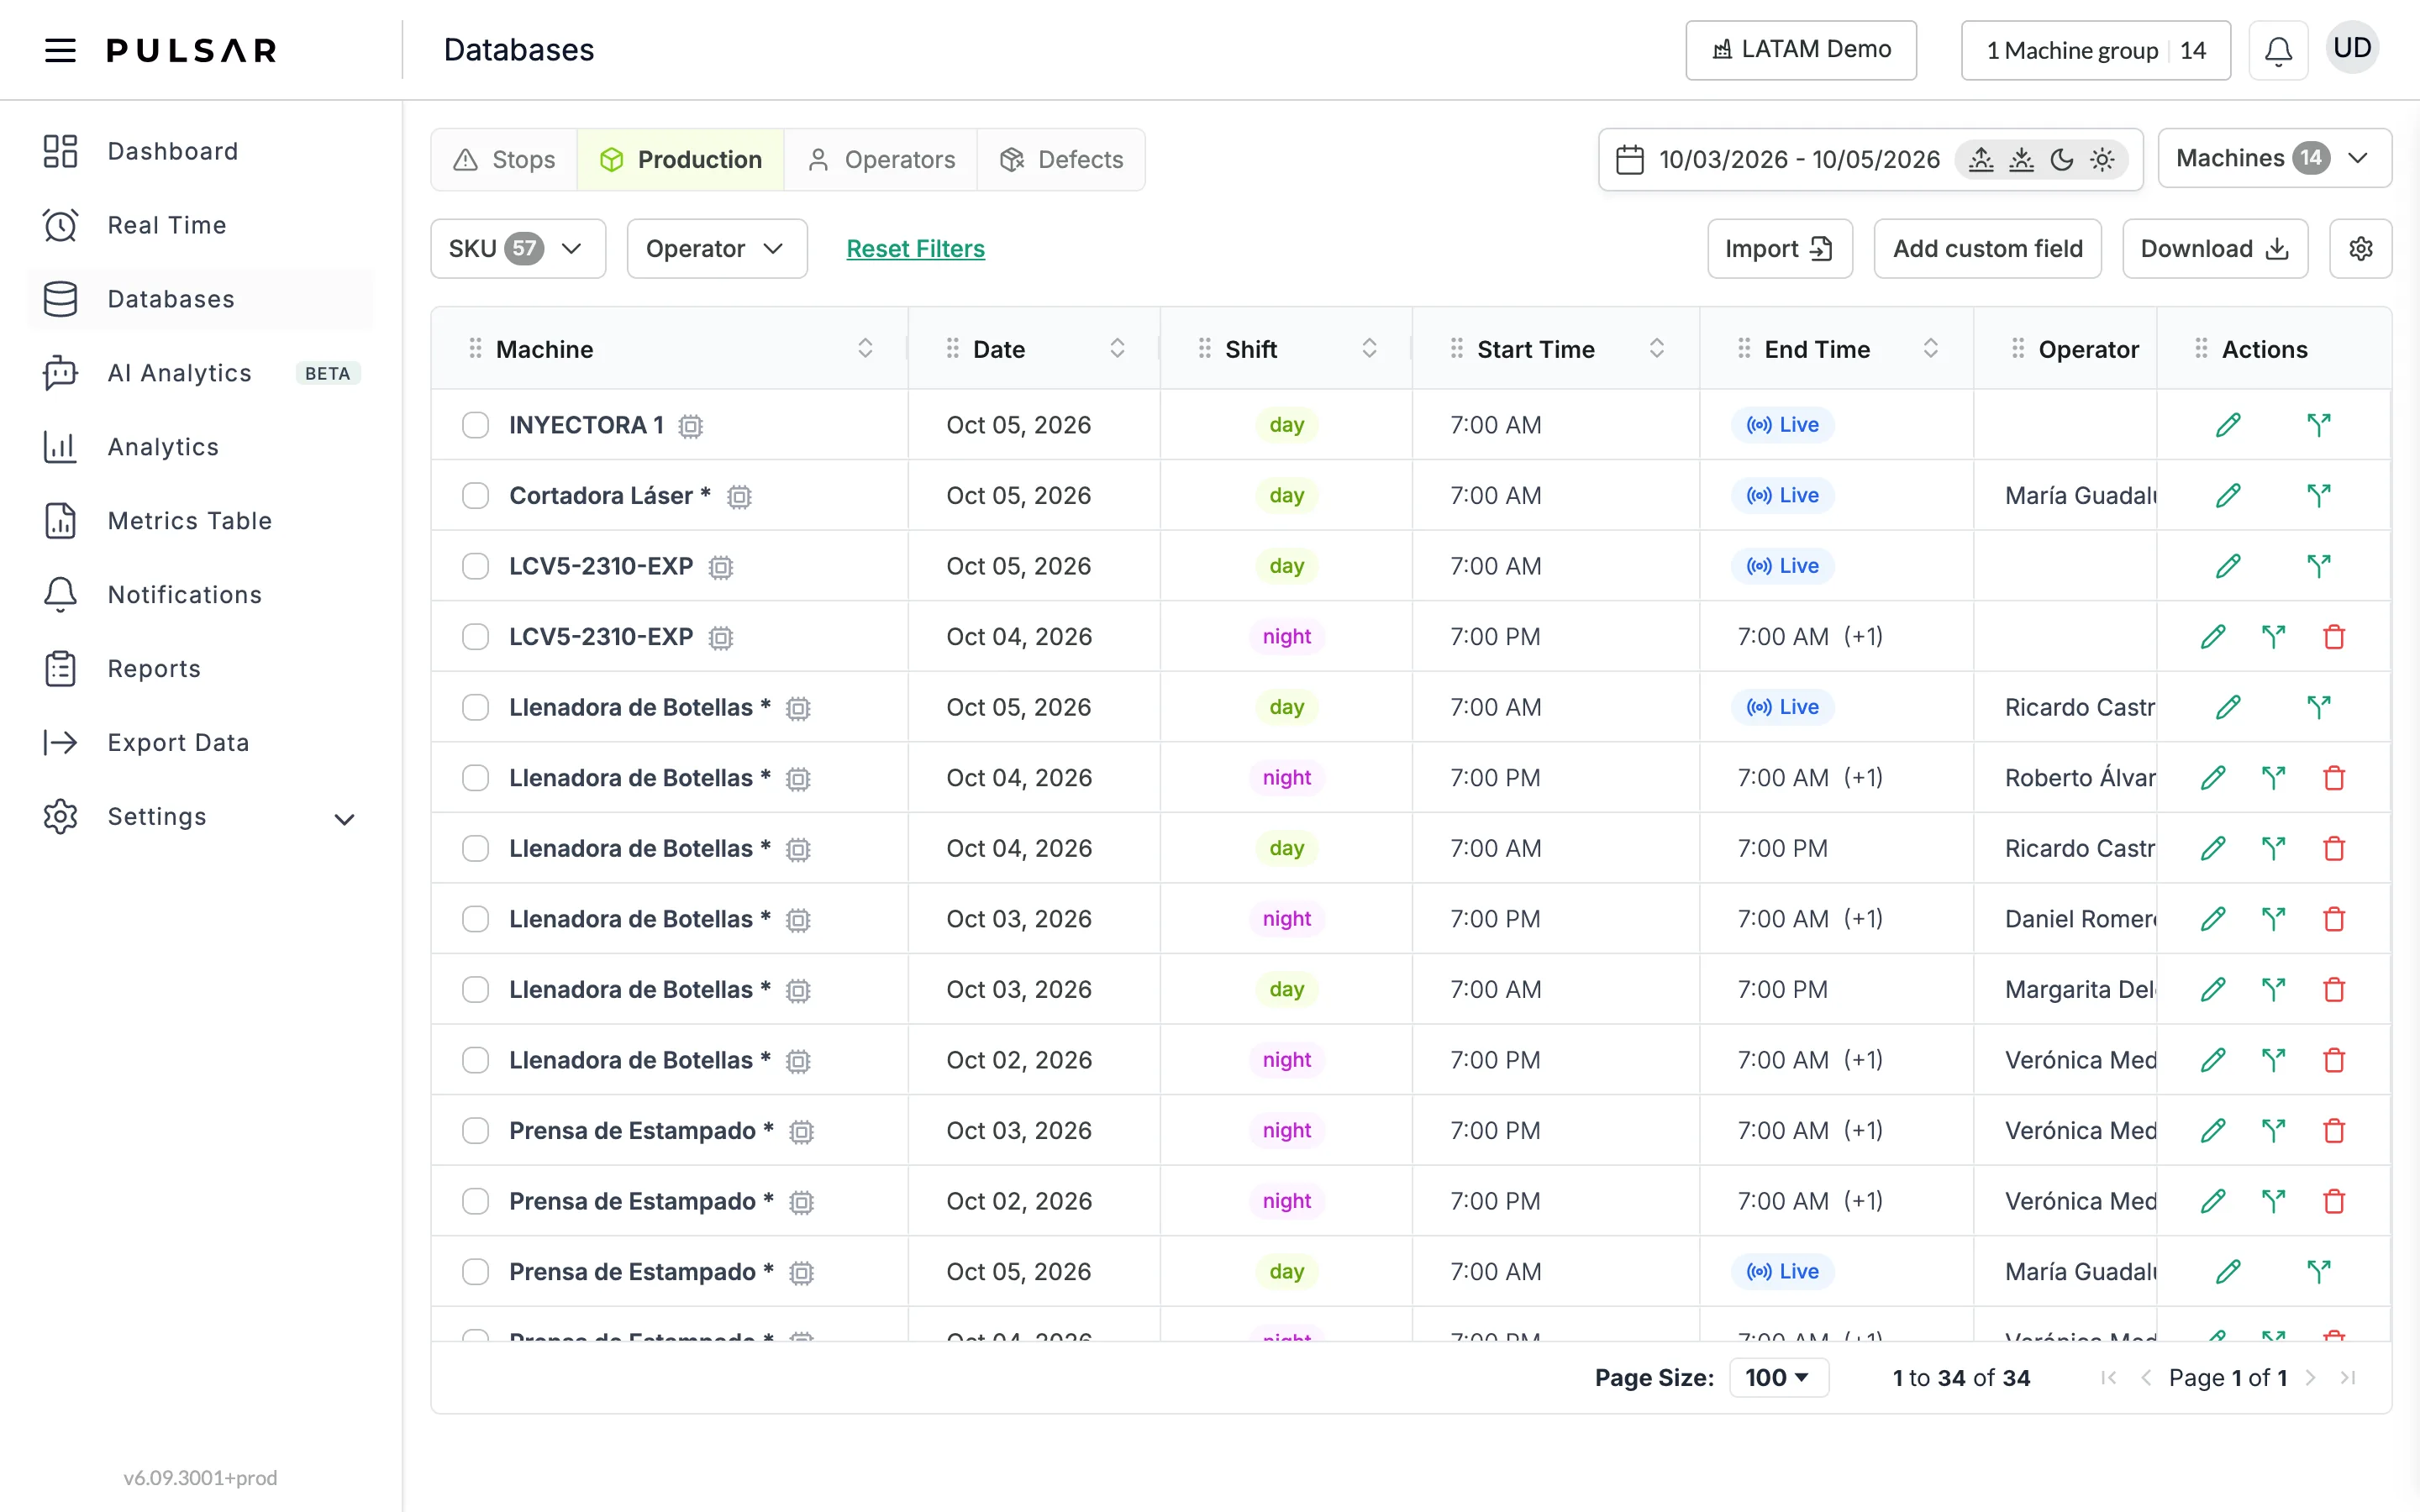
Narrow the list with the SKU and Operator filters: tick the values you want and click Apply. Reset Filters clears them.
Edit a production record
Click the pencil in the row's Actions. The row becomes editable: Quantity, SKU, Nominal speed p/h, Production Order and your custom fields.
Change the values, then click the check mark to save, or the X to discard the changes.
The red trash icon deletes a record. It only appears once the shift has ended.
Split a production record
When a machine produced more than one SKU in a shift, split the record so each part has its own SKU and quantity.
Click the split icon in the row's Actions. The Split advancement dialog shows the record's Start Time and End Time.
Click + to add a time where the record splits, once for each split. Next becomes available.
Click Next. Each part (First production batch, Second production batch…) shows its times. Open each one and fill in its SKU, Nominal speed p/h and Product quantity. Under the quantity, Original sensor value shows what the sensor counted.
Click Confirm, or Back to change the times.
Import production
Click Import to open Upload your files. Download the sample file to see the format, then drag your file onto the Production box or click choose a file, and click Finish. Back to Production returns to the table.
Add a custom field
Click Add custom field. In Create a new custom field, enter the Field name and choose its type: Text, Text area, Number, Checkbox, Single select, Multi select, Date, Image or File. Click Apply to add it, or Cancel. The field becomes a column on the Production and Defects tabs.
The gear button opens Settings → Production, where you manage SKUs, nominal speeds and defect categories.
Operators
The Operators tab lists which operator worked each machine's shift: Machine, Date, Shift, Start Time, End Time, Operator and Action.
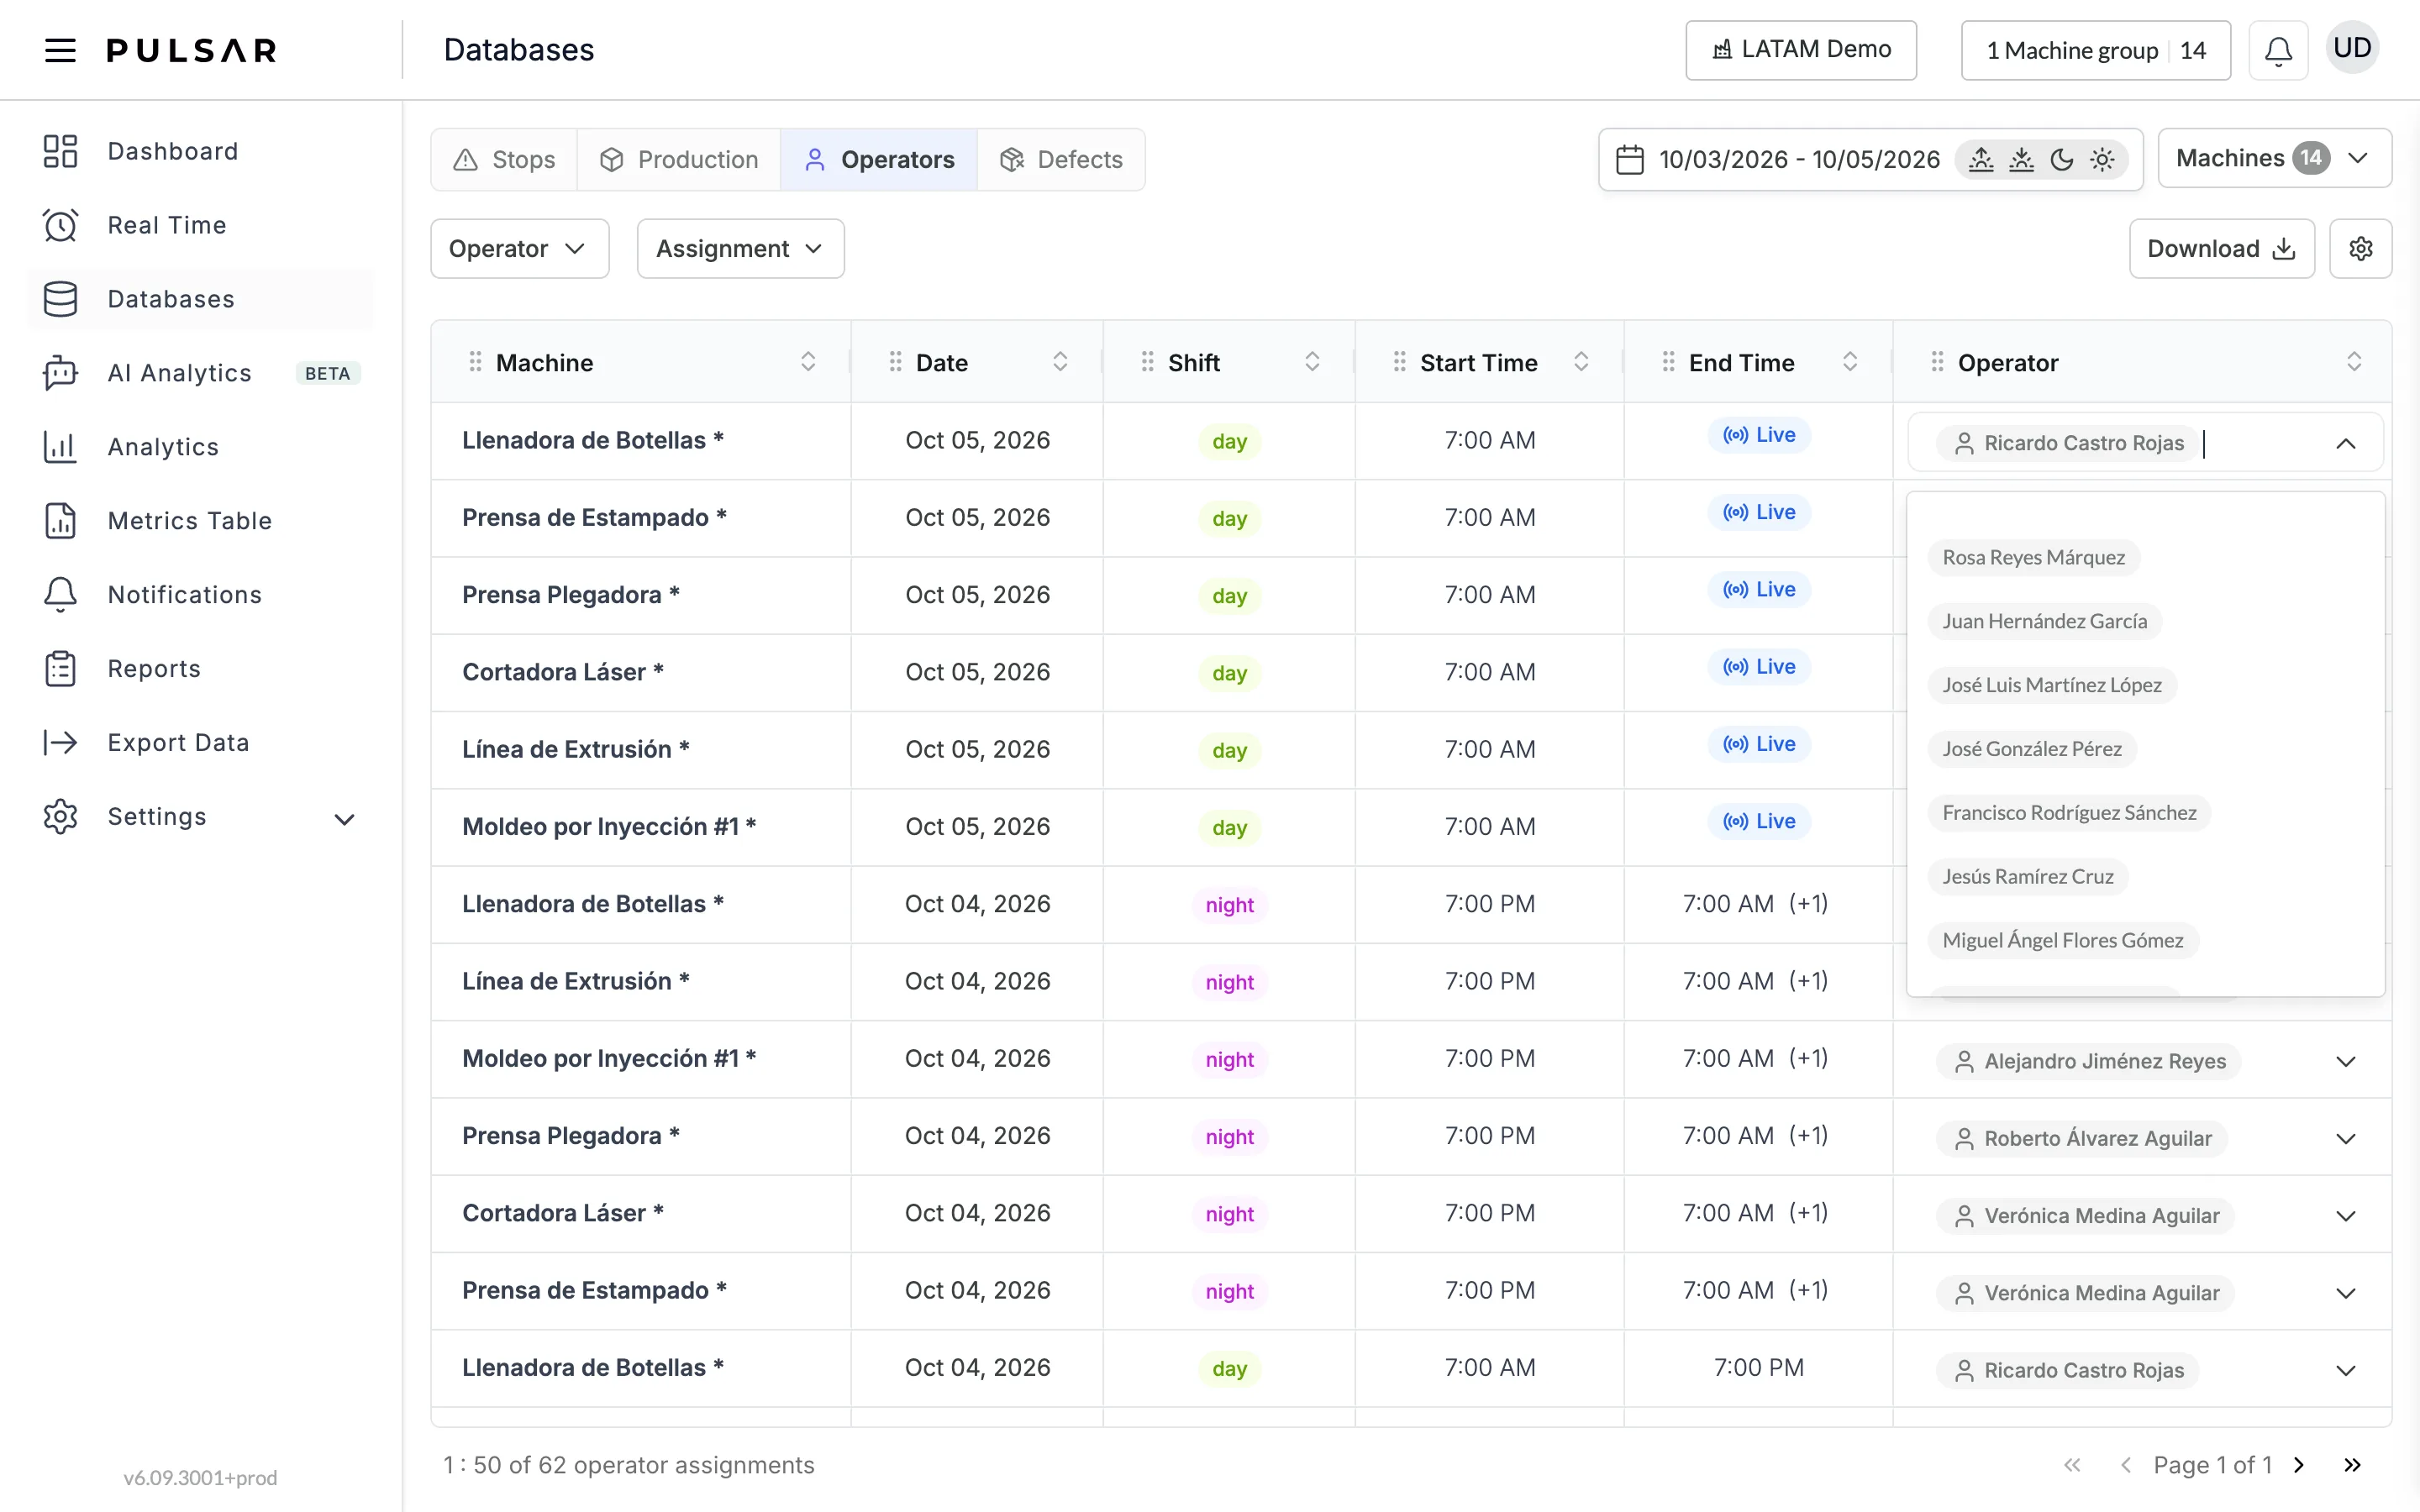
- Change the operator of a shift: open the drop-down in the row's Operator column and choose another operator. This changes that shift only, not your operator planning.
- Split a shift between operators: click the split icon in Action. In Split, click + to add the time when the operator changed, then Next.
- Filter: Operator shows only the operators you tick; Assignment shows Assigned or Unassigned shifts, with Hide all and Show all.
The gear button opens Settings → Operators.
Defects
The Defects tab lists the defects recorded on each machine and shift: Machine, Date, Shift, Start Time, End Time, Quantity, SKU, Category, your custom fields and Actions. Narrow it with the Production Order and SKU filters; Reset Filters clears them.
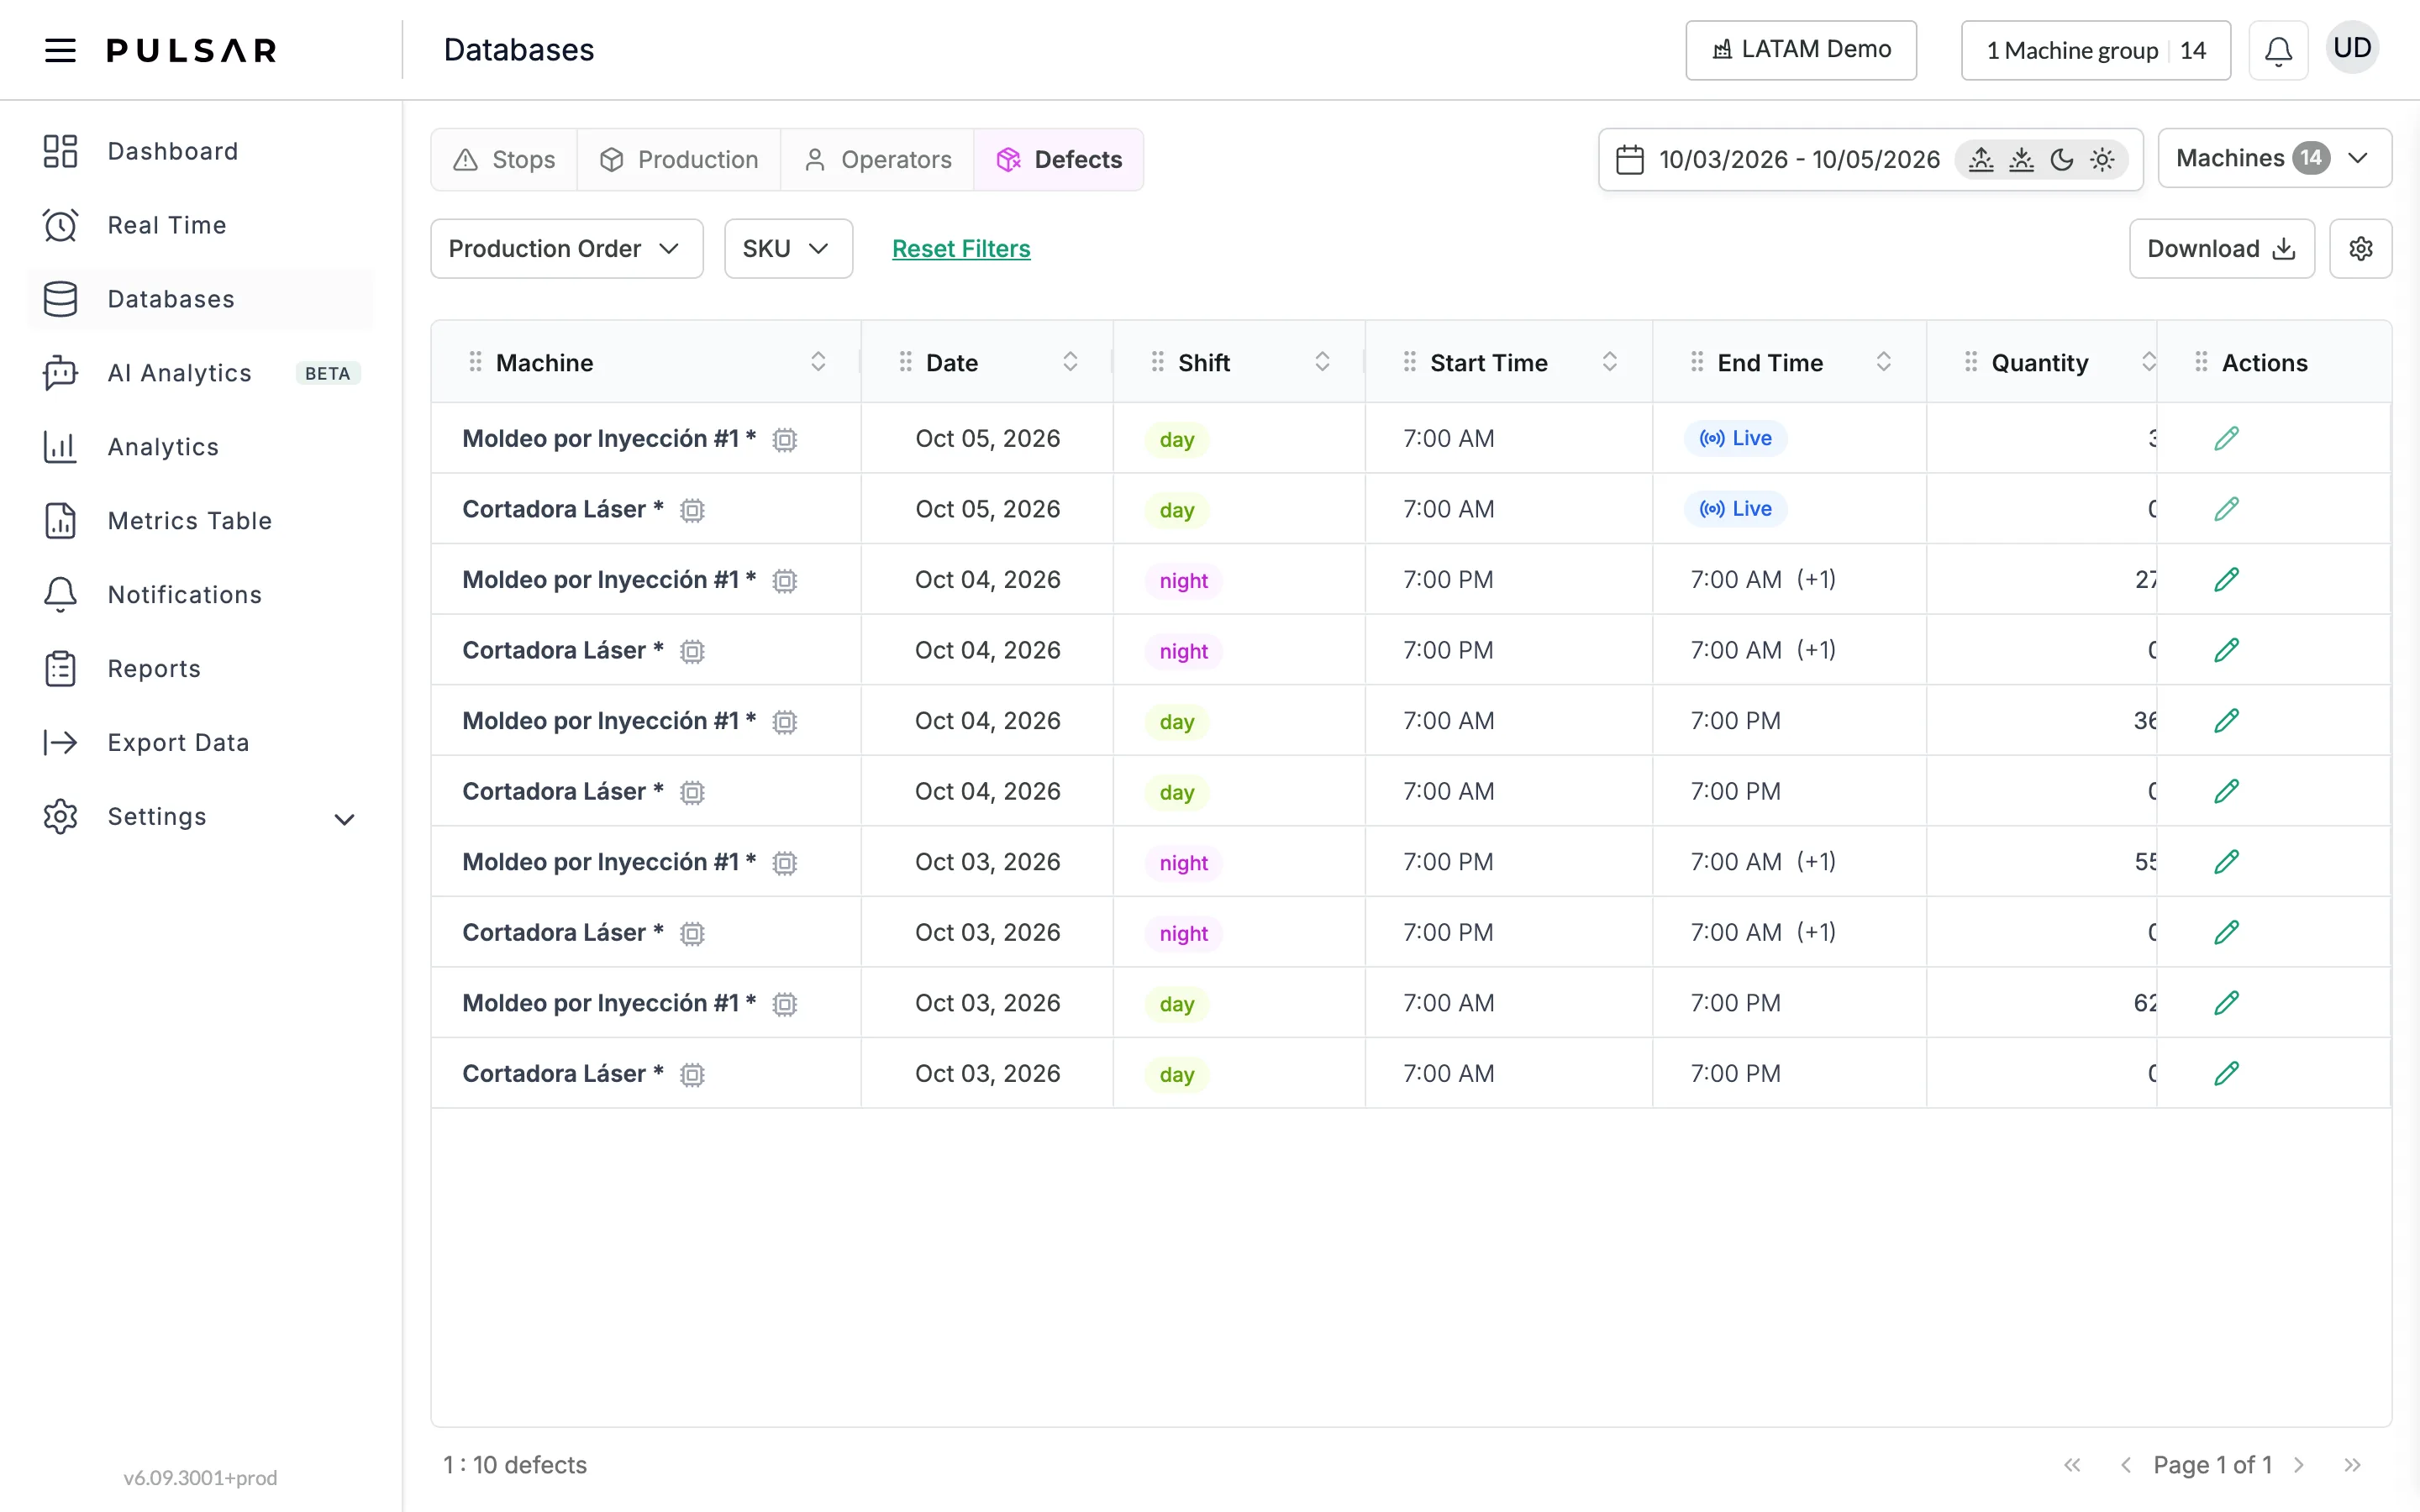
To correct a record, click the pencil in Actions. Quantity, SKU, Category and your custom fields become editable; click the check mark to save, or the X to discard.
The gear button opens the Defects tab of Settings → Production, where you manage the defect categories.