Classify stops in the app
Classify, edit and split your machine's stops from the Pulsar app, with a general cause, a specific cause and optional details.
This page shows how to classify and edit stops in the Pulsar app: choosing the general and specific cause, using a third classification level, and adding a description before you submit.
Open the stops list
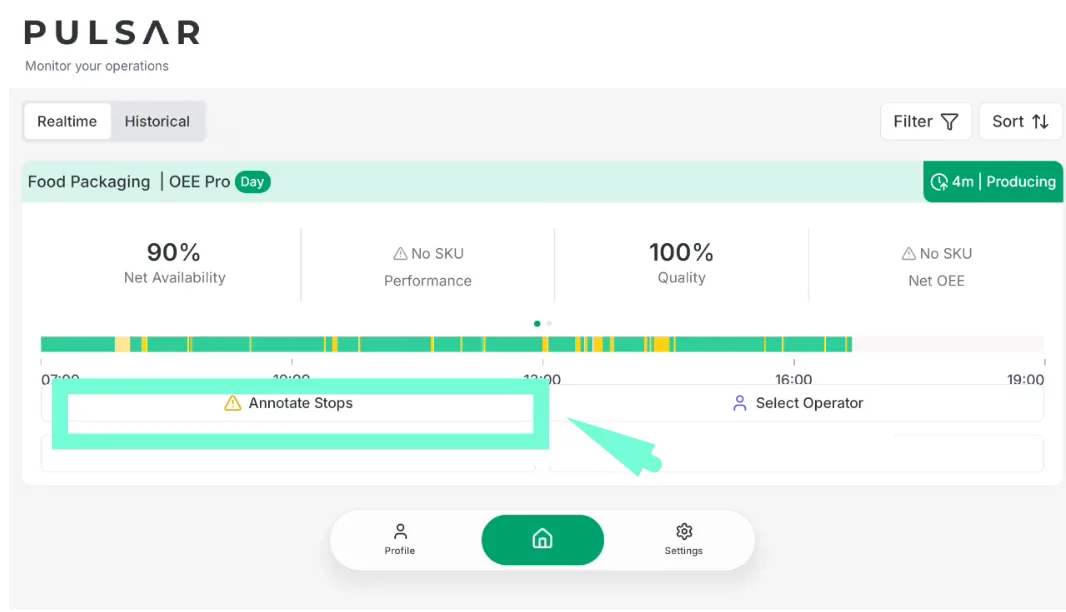
On Home, find the machine whose stops you want to classify, and tap Annotate Stops on its card. Once every stop is classified, the button shows the specific cause of the last stop instead.
The Annotate Stops screen has three tabs: Unassigned, Assigned and All. It opens on Unassigned, which lists the shift's stops that haven't been classified yet, newest first. For each stop you see:
- how long it lasted
- its start and end times
- a blue LIVE badge if it's still happening: the machine is still stopped and needs a reason. On a phone, the badge shows only its icon.
Classify a stop
Choose the stop
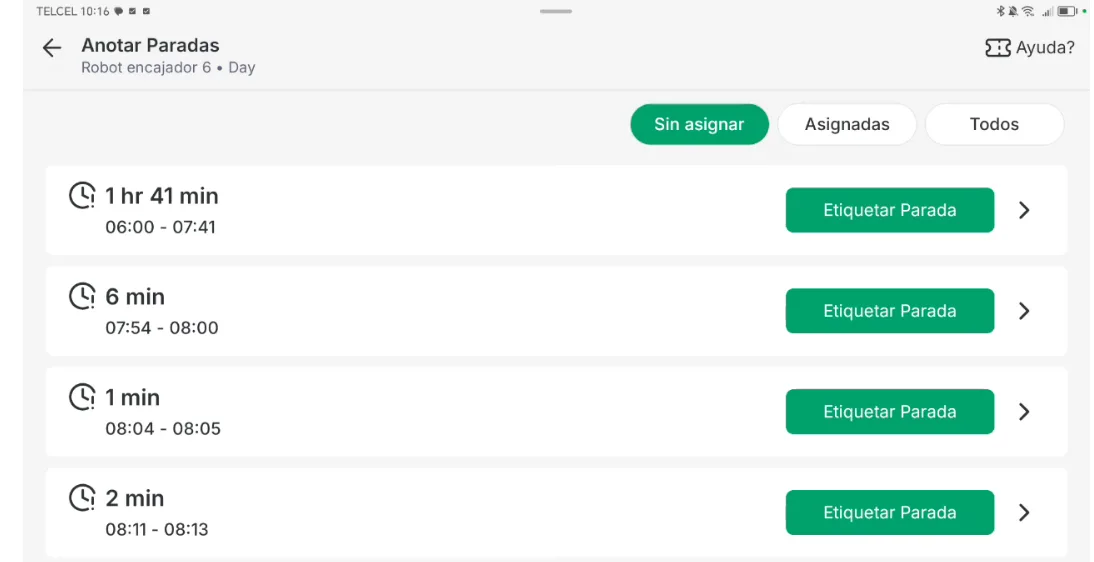
In the Unassigned list, tap the stop's Label Stop button (on a phone, Label). You can also tap the stop to open its summary and tap Label Stop there.
The causes you can choose come from the catalog of stop reasons your administrator sets up for each machine.
Choose the general and specific cause
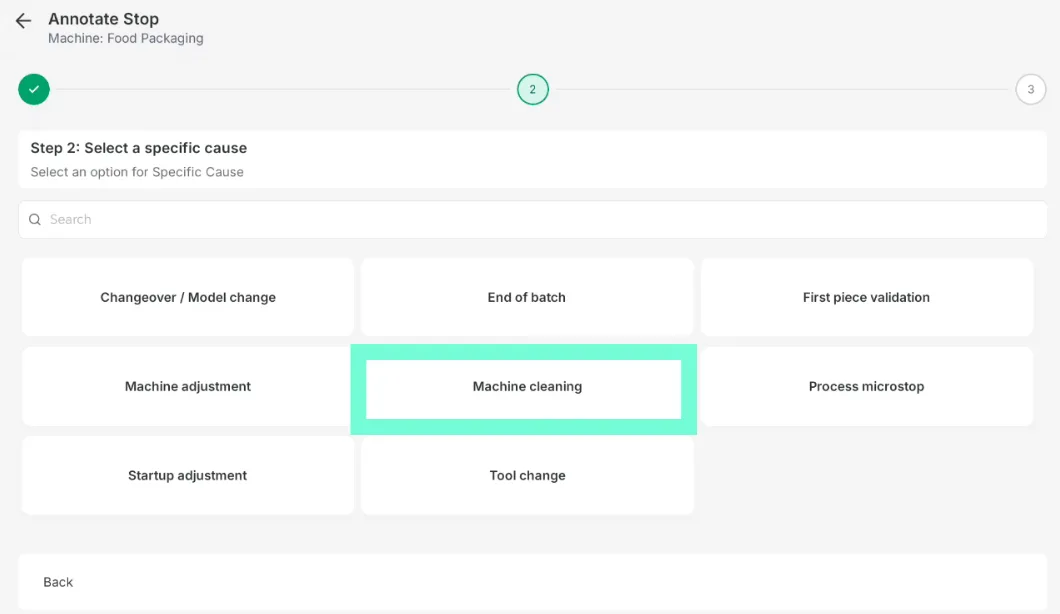
In Step 1: Select a general cause, choose the main reason for the stop, such as Production, and tap Next. In Step 2: Select a specific cause, choose the cause that says in more detail why the stop happened within that category. Both steps have a search field.
Add details
If your account uses a third classification level, the next step asks you to choose it. It's usually called Equipment, but your account can give it another name.
In the last step, Add a description, you can add notes about the stop to document it better for your team. This is optional.
Submit
Below the description, the Stop summary shows the general cause, the specific cause and the third level you chose. Check it and tap Submit. The stop leaves the Unassigned tab and moves to Assigned, with the other classified stops.
The goal is that by the end of your shift every stop is classified, so the reason for every stop is clear.
Edit a classified stop
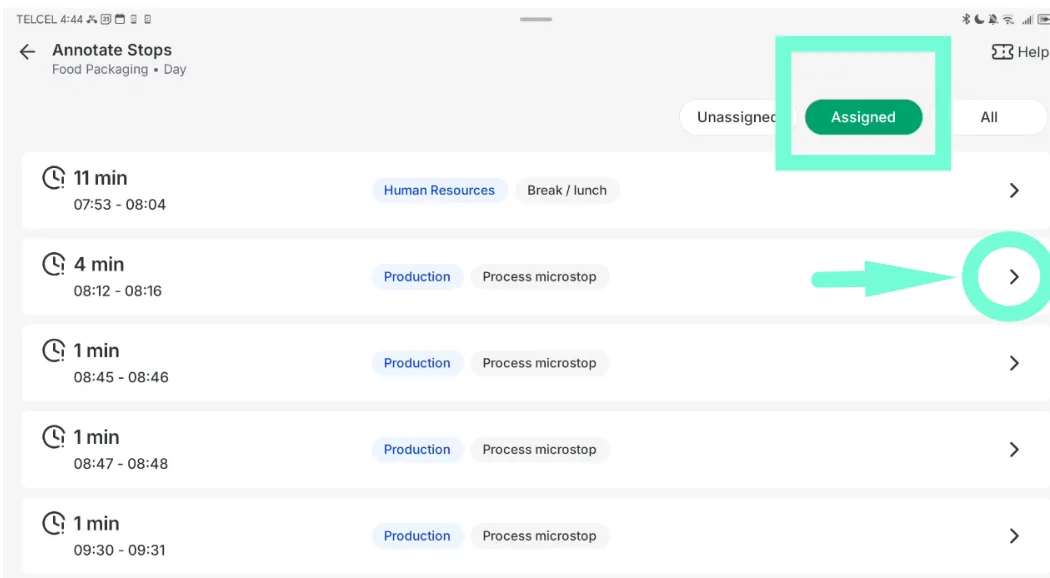
You can change the classification of a stop you've already labeled, such as one from the start of your shift, if your user is allowed to edit classifications. If you don't see Edit Stop, ask your administrator.
- On the Assigned tab, tap the stop or the arrow next to it.
- In the summary that opens, tap Edit Stop, change the reason and tap Submit.
Split a stop
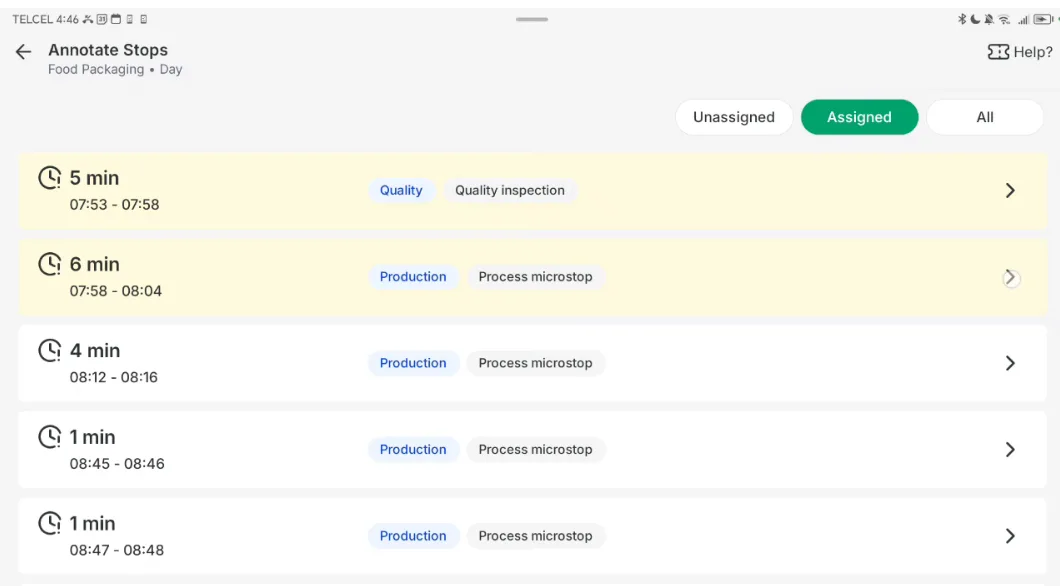
If a single stop had different reasons, for example 5 minutes for quality and 6 minutes for production, without the machine restarting in between, split it into separate parts.
Tap the stop you want to split, on any tab. In the summary that opens, tap Split.
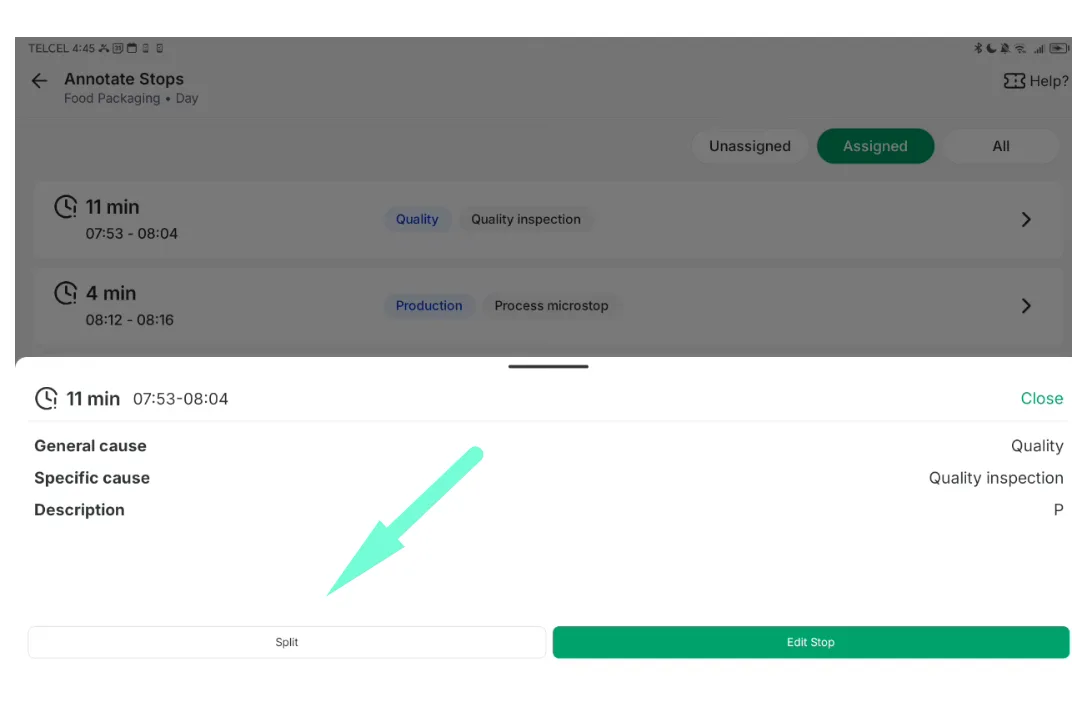
The Split Stop screen shows the stop's Start Time and End Time. Tap + to add a time where the stop splits, and tap each split time to change it. − removes a split. The screen shows how long each part lasts.
Each part must last at least one minute, and the split times must be in order, before the stop's end and before the current time. If your account uses a third classification level, choose it before you submit.
The original time isn't deleted, only divided, so you can give each part a different reason.
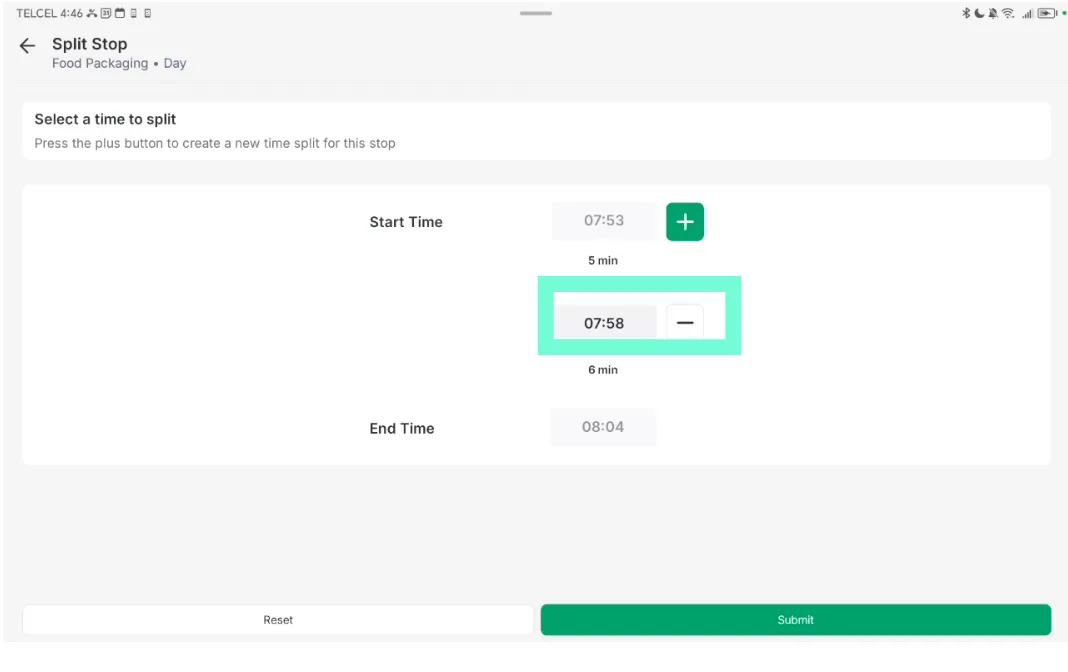
Tap Submit. The original stop now shows as two or more stops, for example of five and six minutes, and you can classify each one separately. Reset clears the splits instead.