Goals
Set an availability goal for each machine and compare it against actual availability in Analytics.
Pulsar lets you set an availability goal for each of your machines.
Video
Set an availability goal
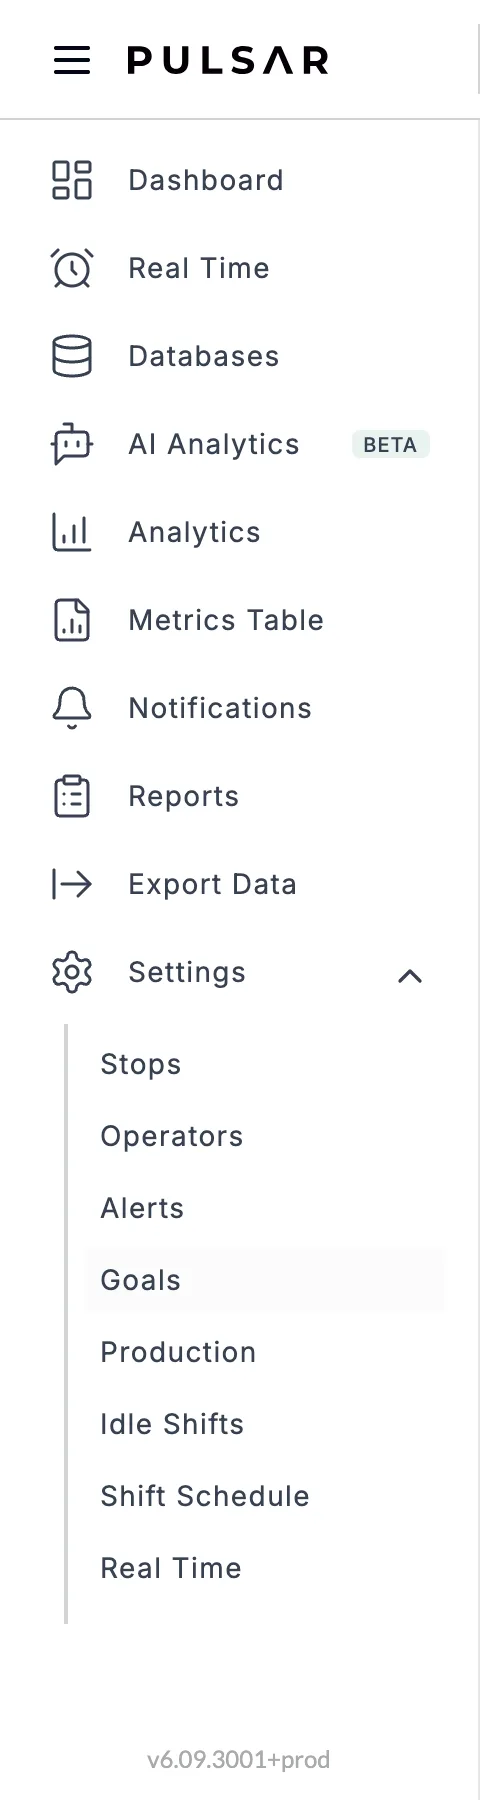
Go to Settings > Goals.
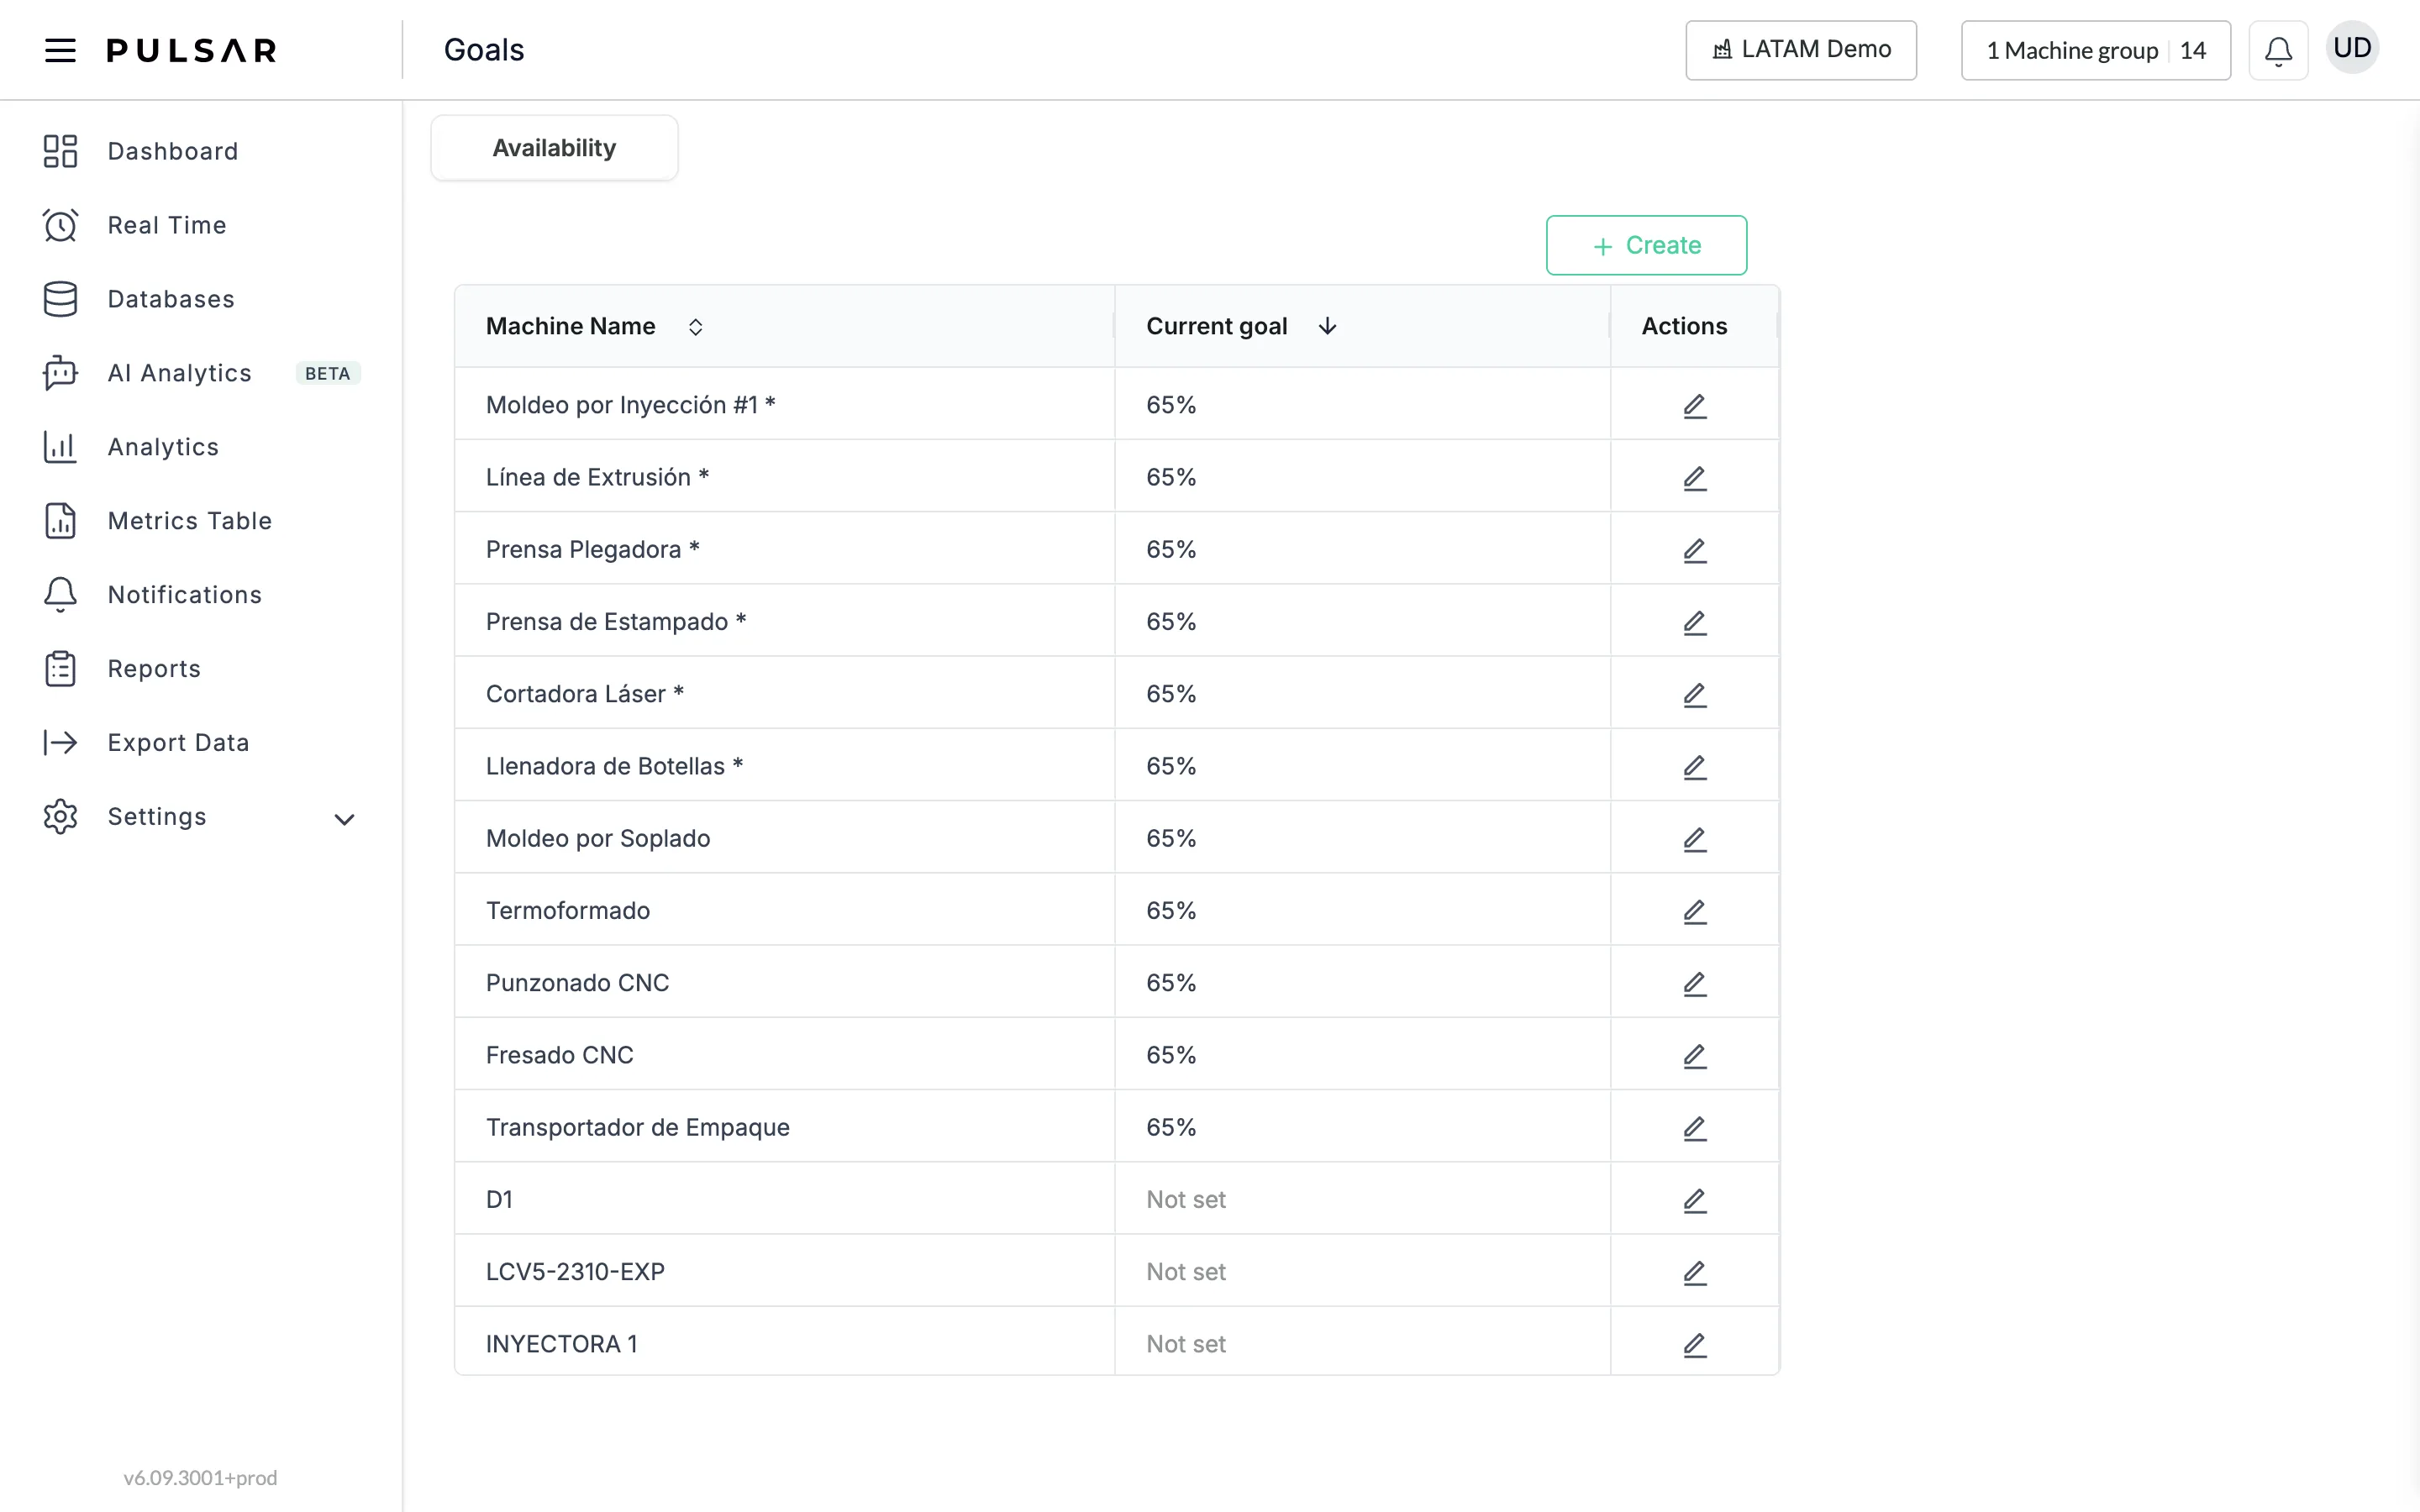
On the Availability tab, the table lists every machine with its Current goal (Not set if it has none). Click Create, or click the edit (pencil) icon of a machine in the Actions column.
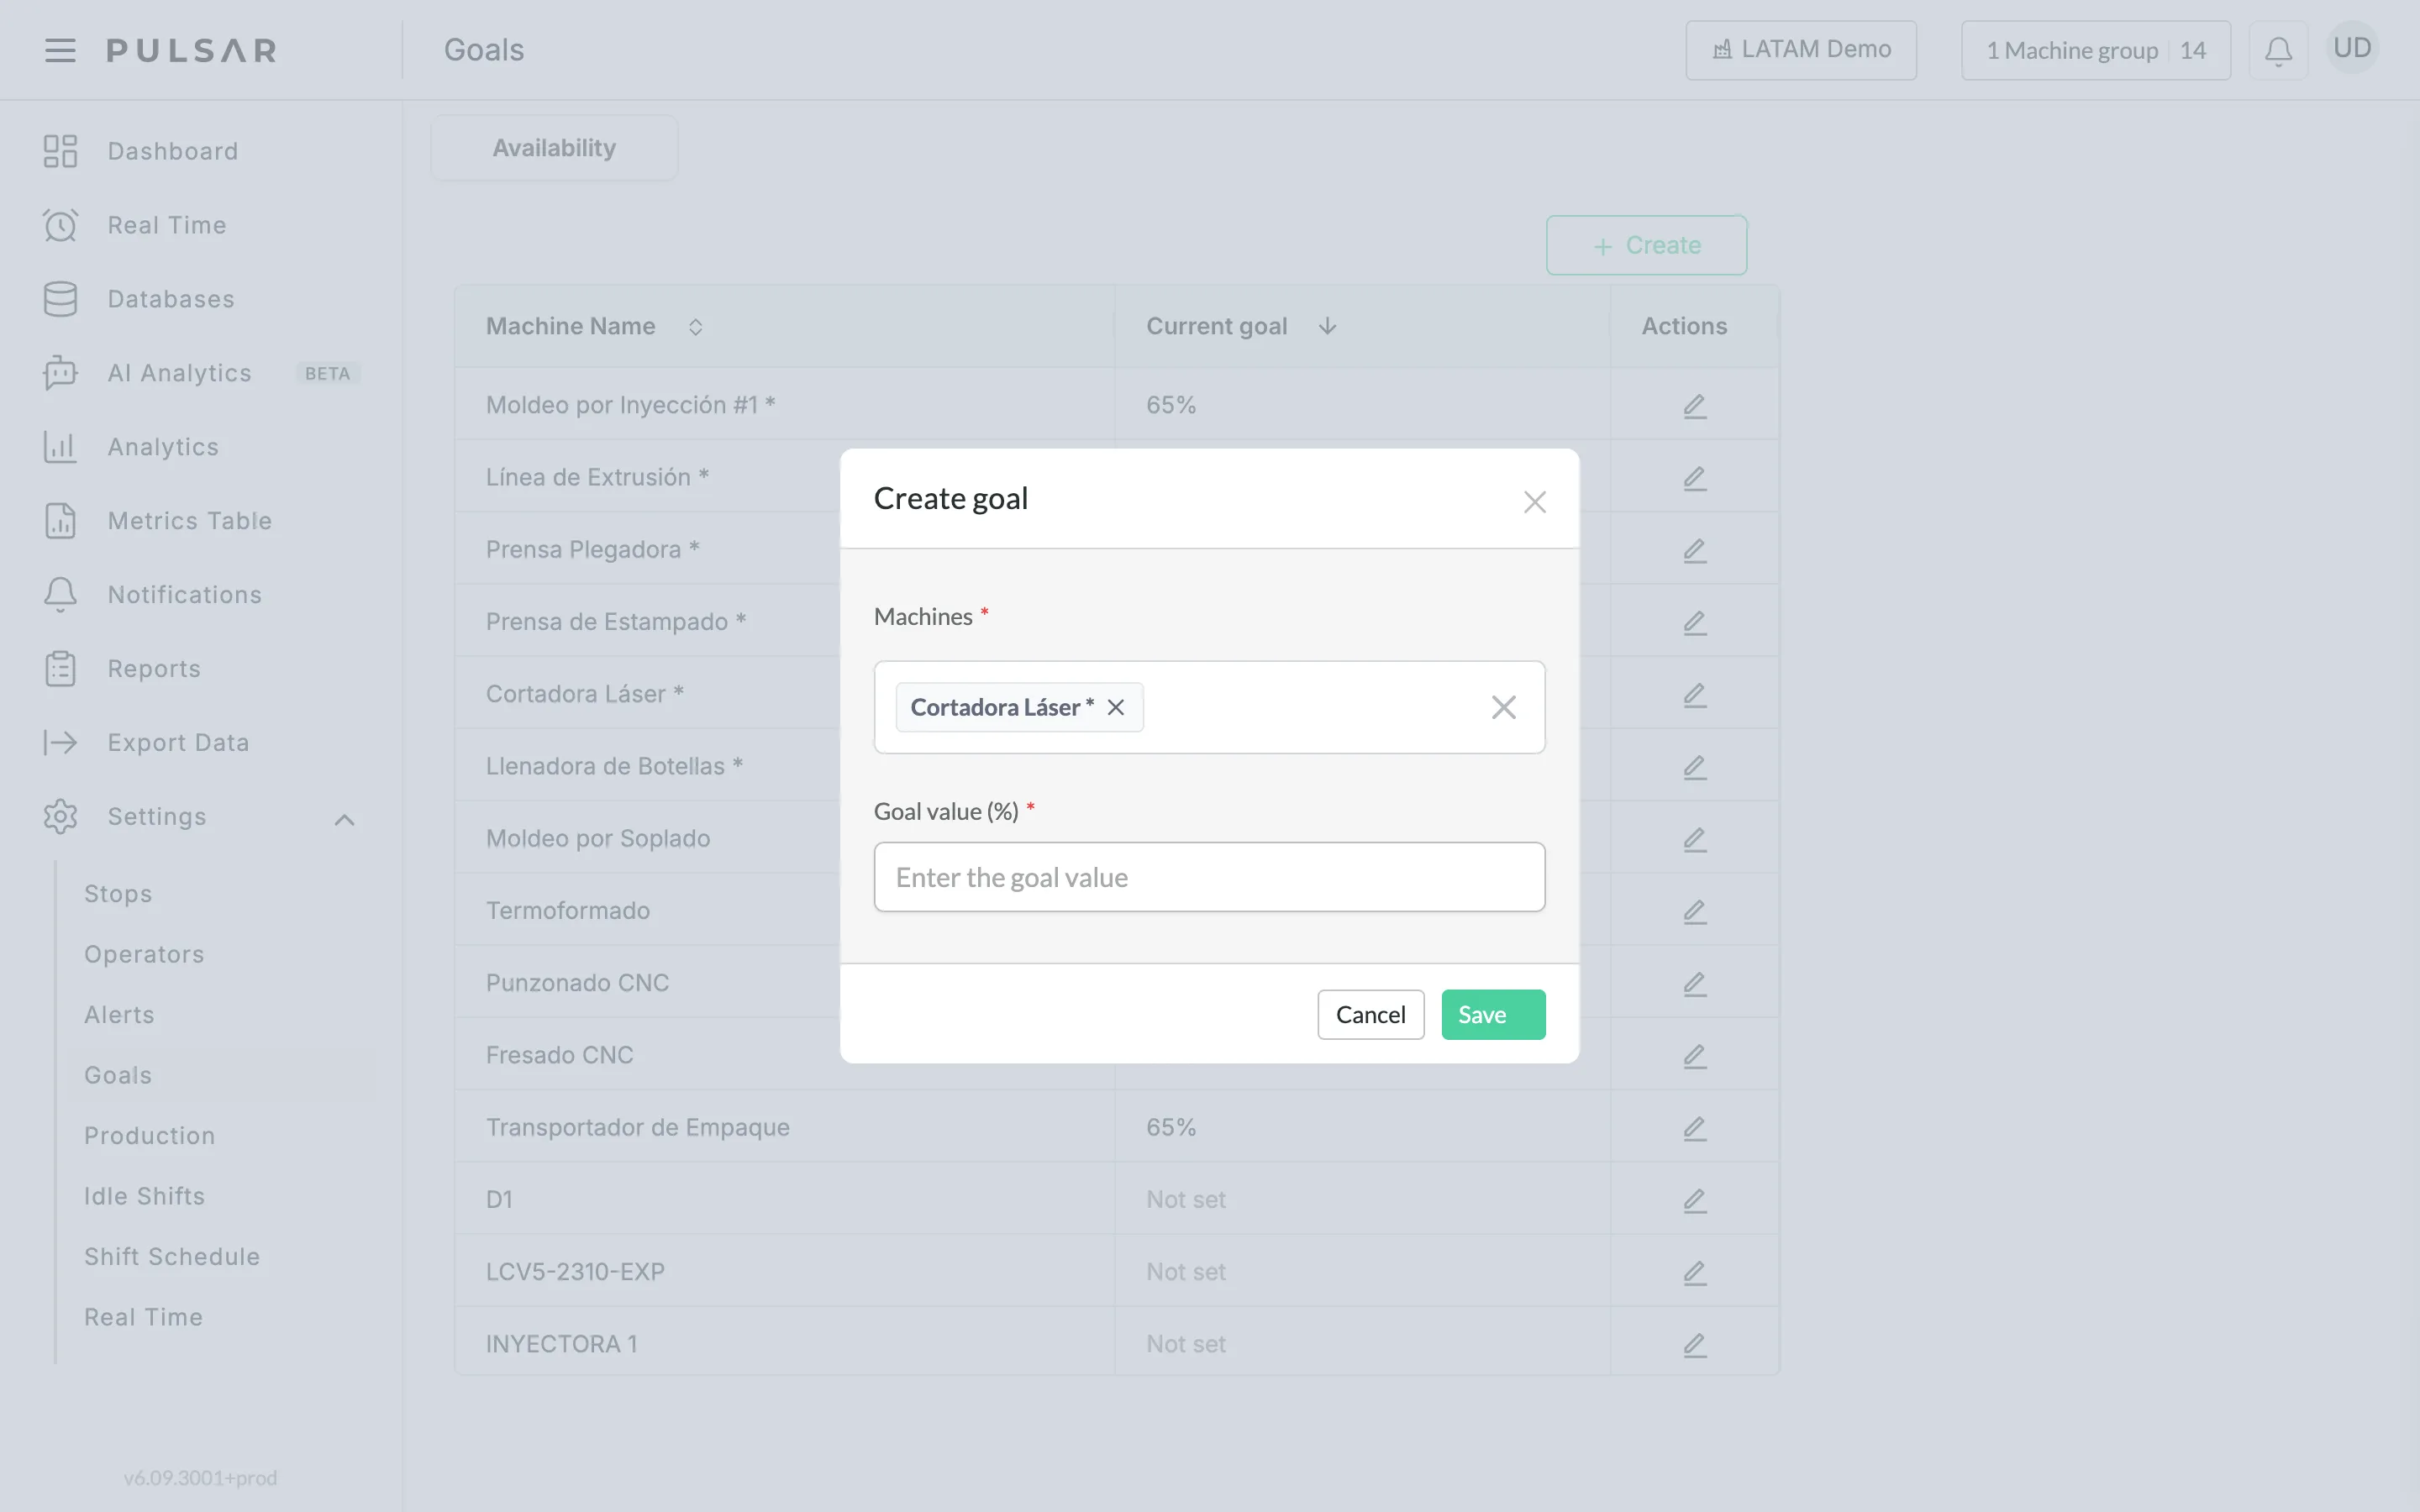
In the Create goal dialog, choose the machines in Machines (the pencil icon fills in that machine for you; use Select All to pick every machine), enter the availability goal in Goal value (%) and click Save.
Analytics
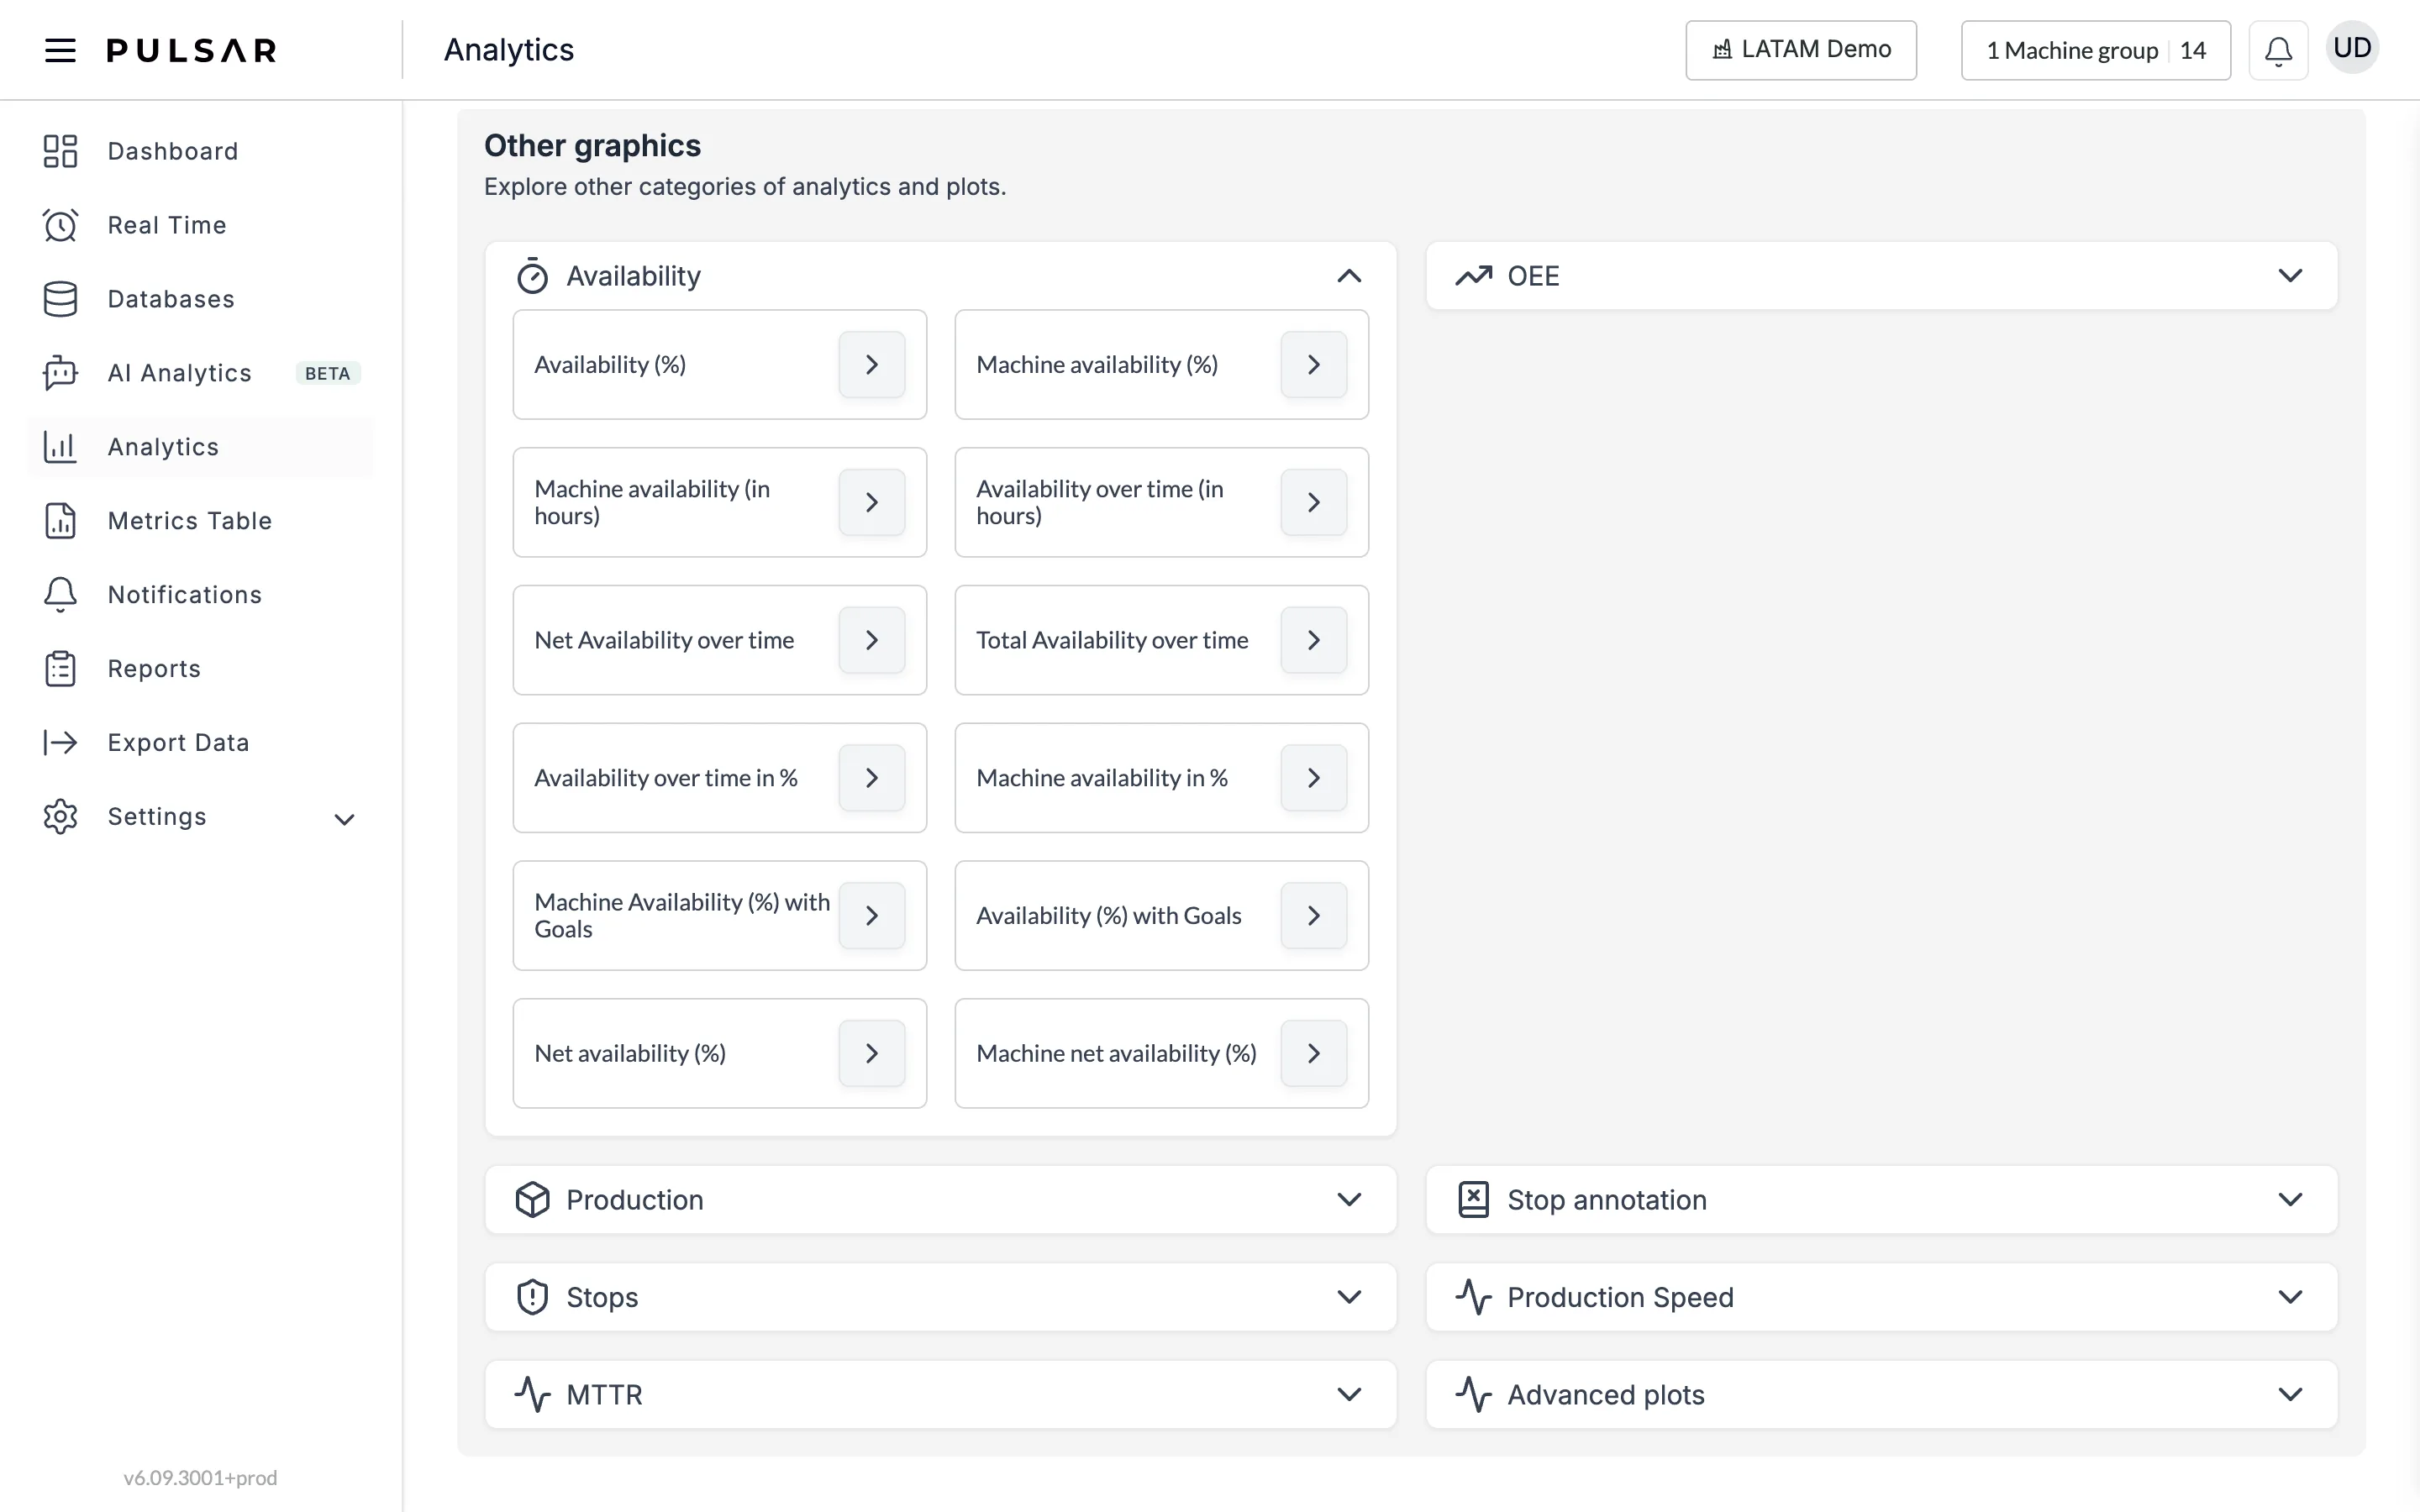
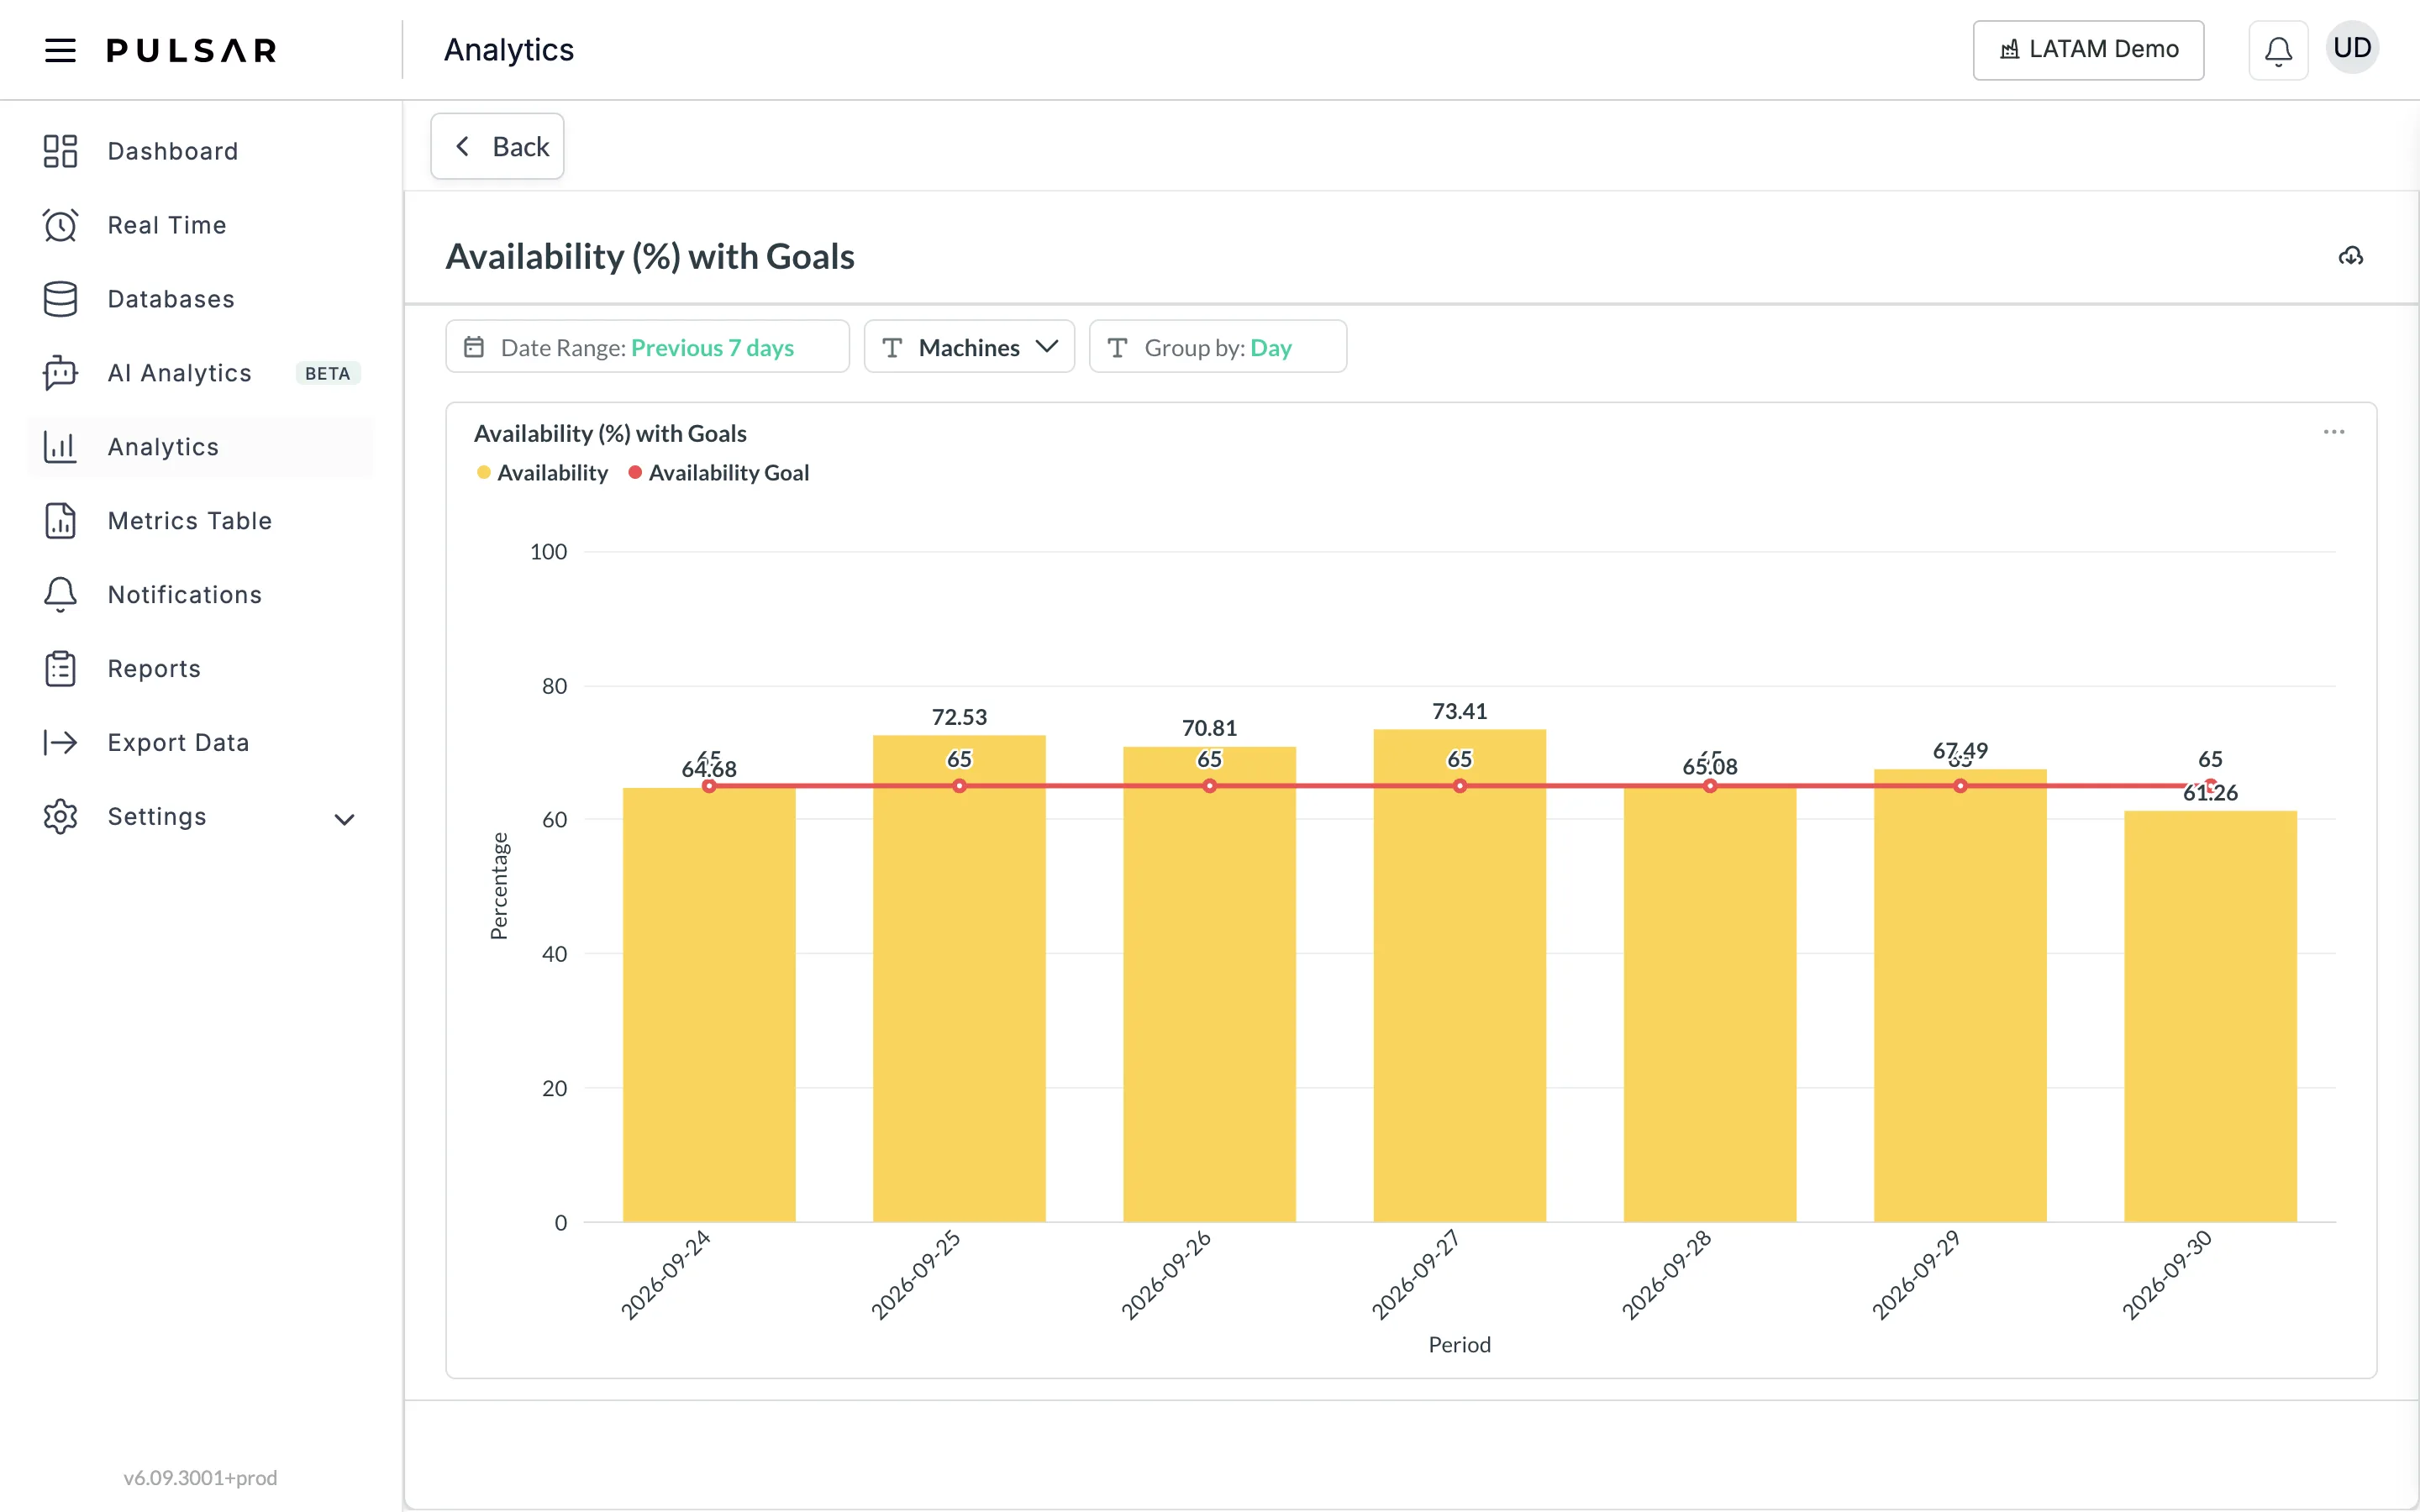
You can also look at your machines' availability against their goal in Analytics:
- Under Dashboards, open Availability with Goals.
- Under Other graphics, the Availability category includes two charts with goals: Machine Availability (%) with Goals and Availability (%) with Goals.
If you have trouble with availability goals or need help, contact your Customer Success representative or raise a support ticket from the app.