Machine groups
Group machines to filter them faster on every screen, and restrict what each user sees to their groups.
You can group machines to filter them more quickly, or even restrict a user's view to certain machine groups.
Video
Create a machine group
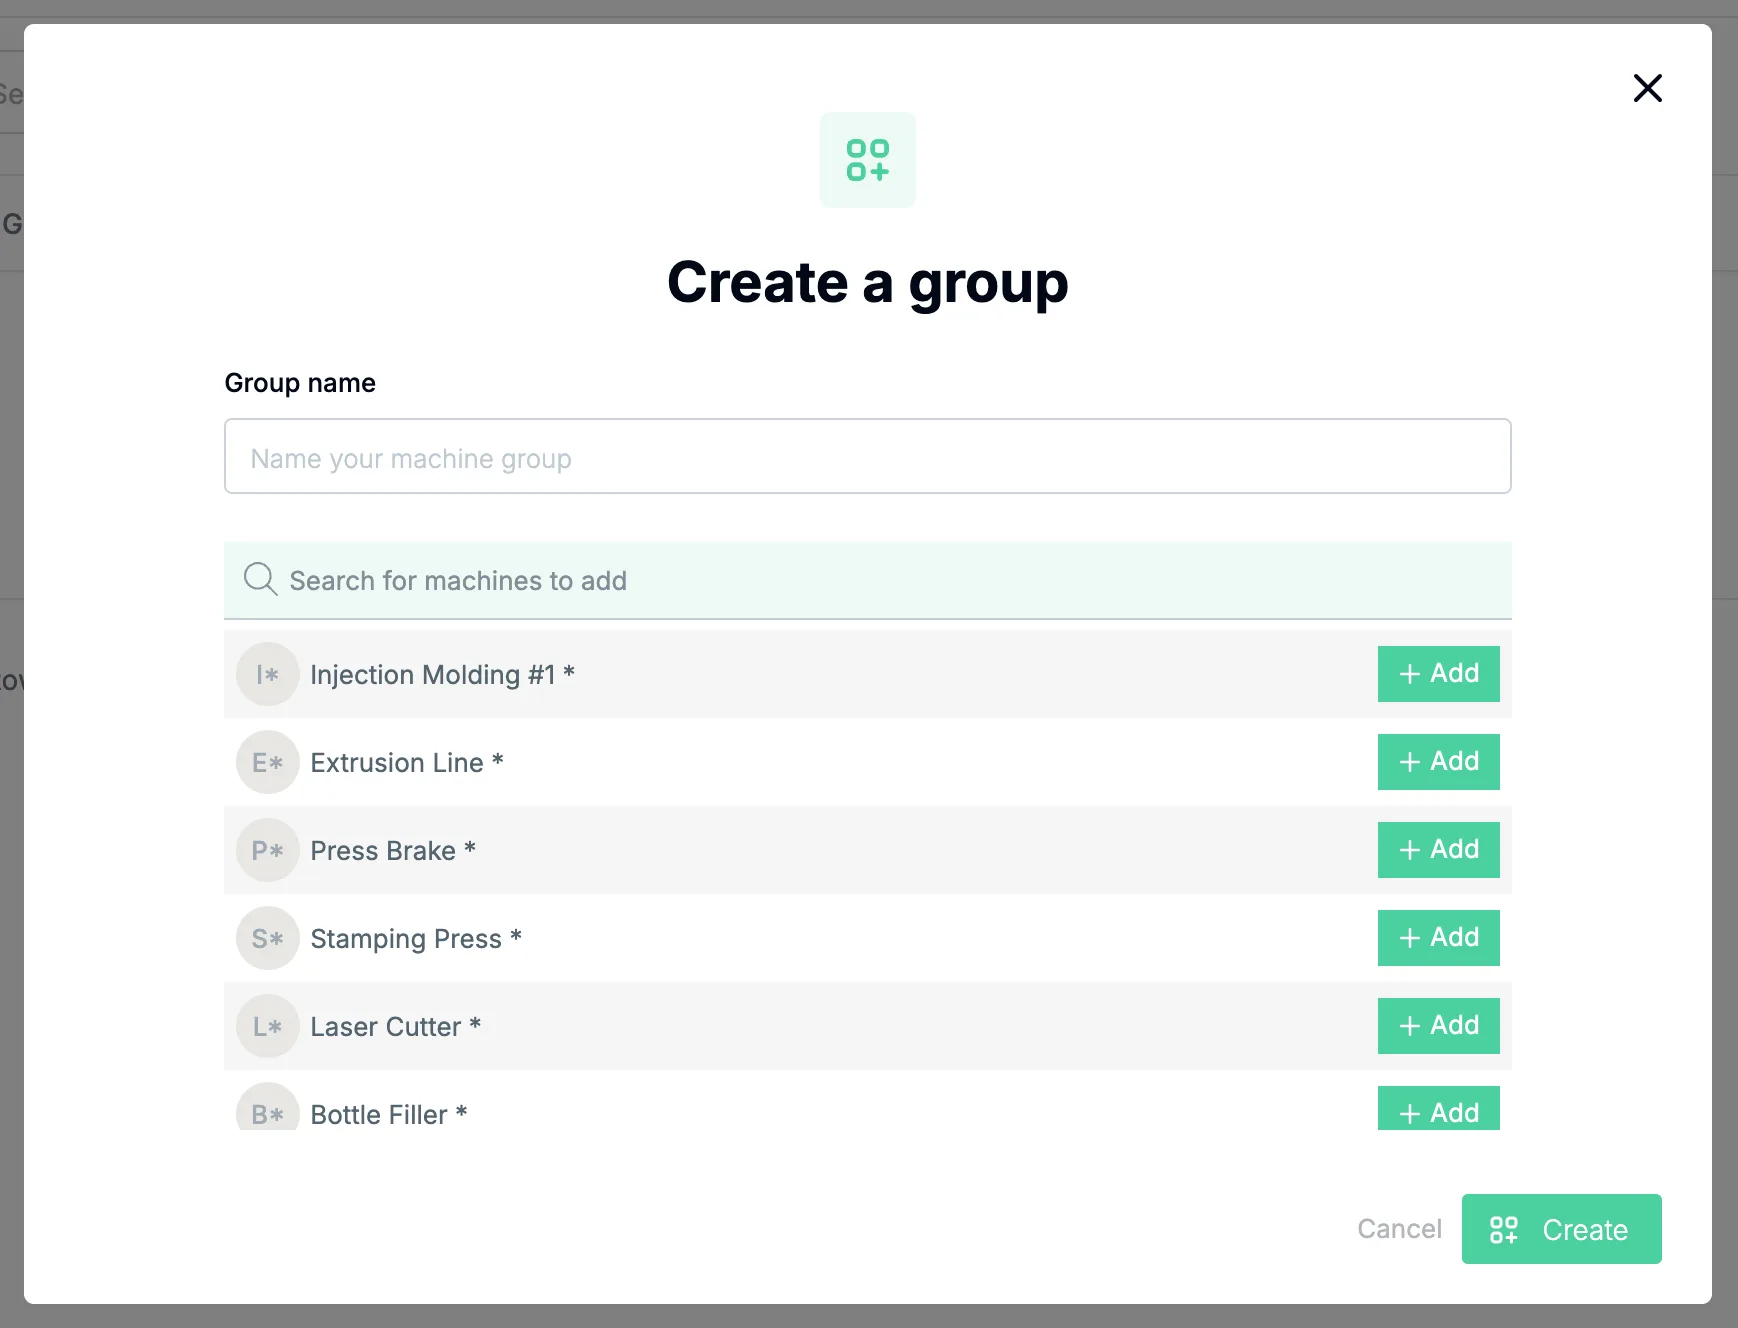
Go to Settings > Machine groups and click CREATE GROUP.
In Create a group, type the Group name, find the machines with Search for machines to add, click Add next to each one, and click Create.
The group appears in the Groups table, with its Group name, its Machines, a Users icon that lists the users assigned to the group, and, under Action, a pencil to edit it (Update group: rename it or click Add / Added to add or remove machines, then Update) and a trash icon to delete it.
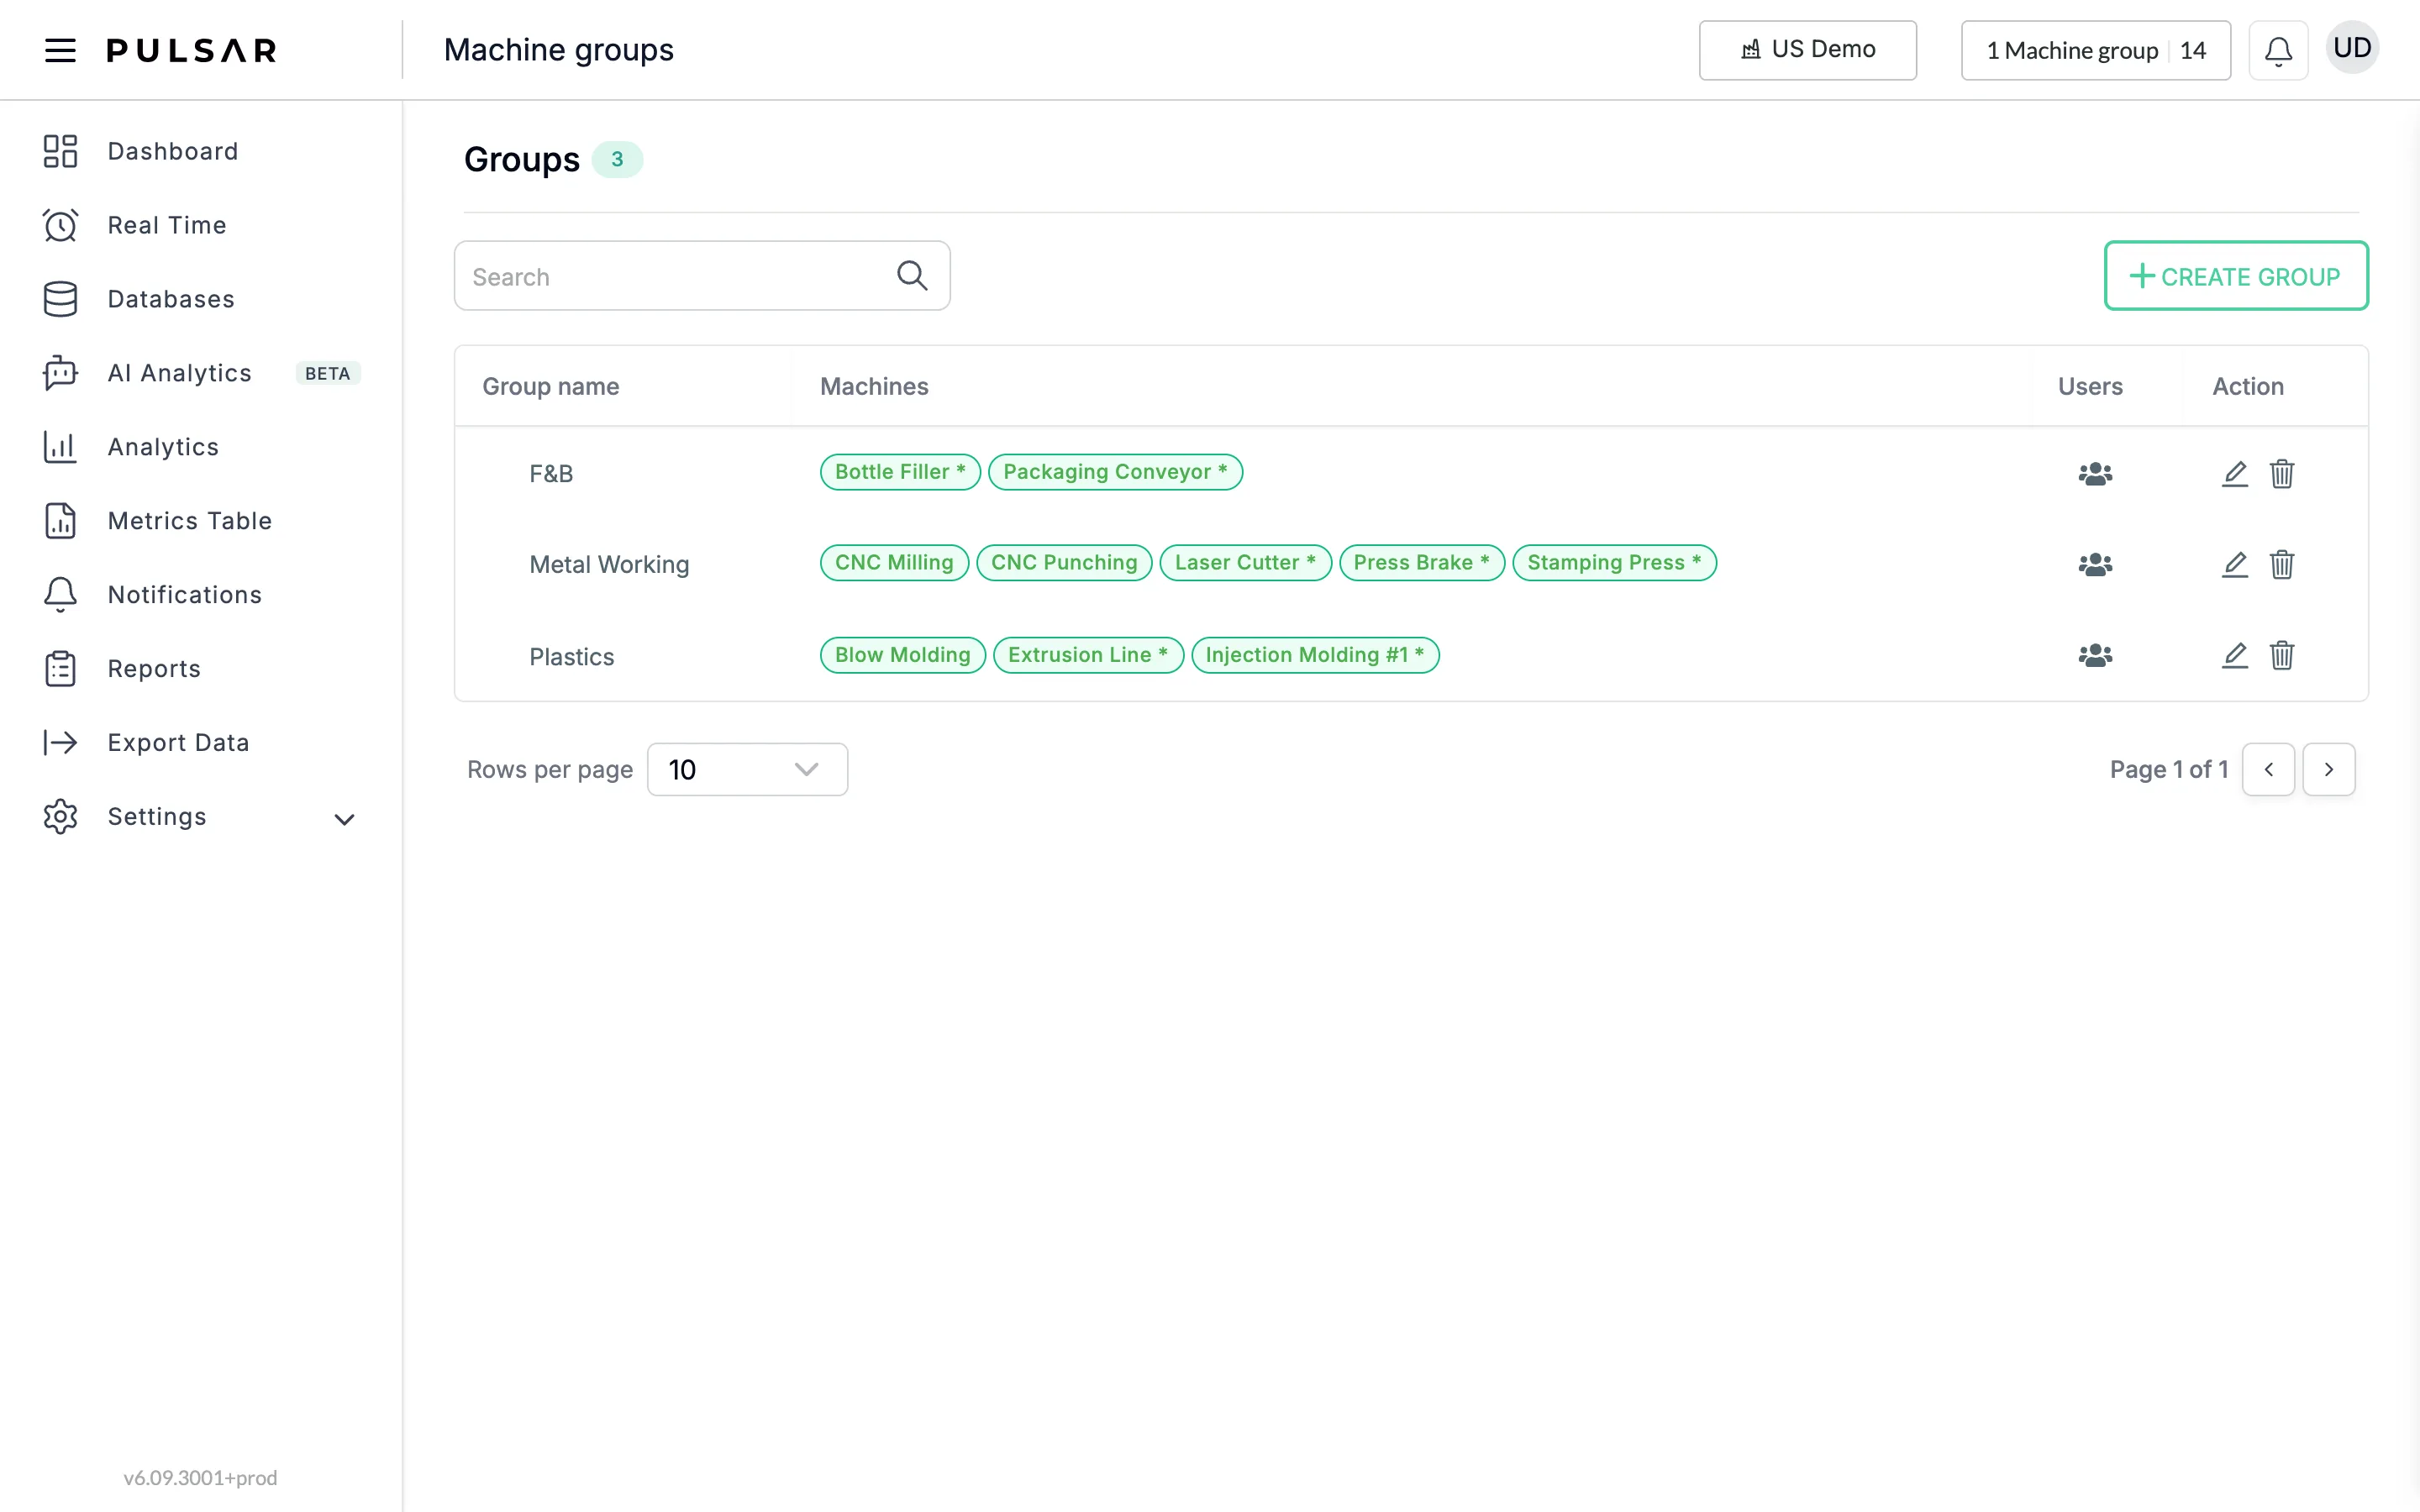
At the top right of the app, the machine group button (for example 1 Machine group | 14) opens Machines Selection, where you filter the machines you see by group or one by one, and click Apply.
Assign groups to users
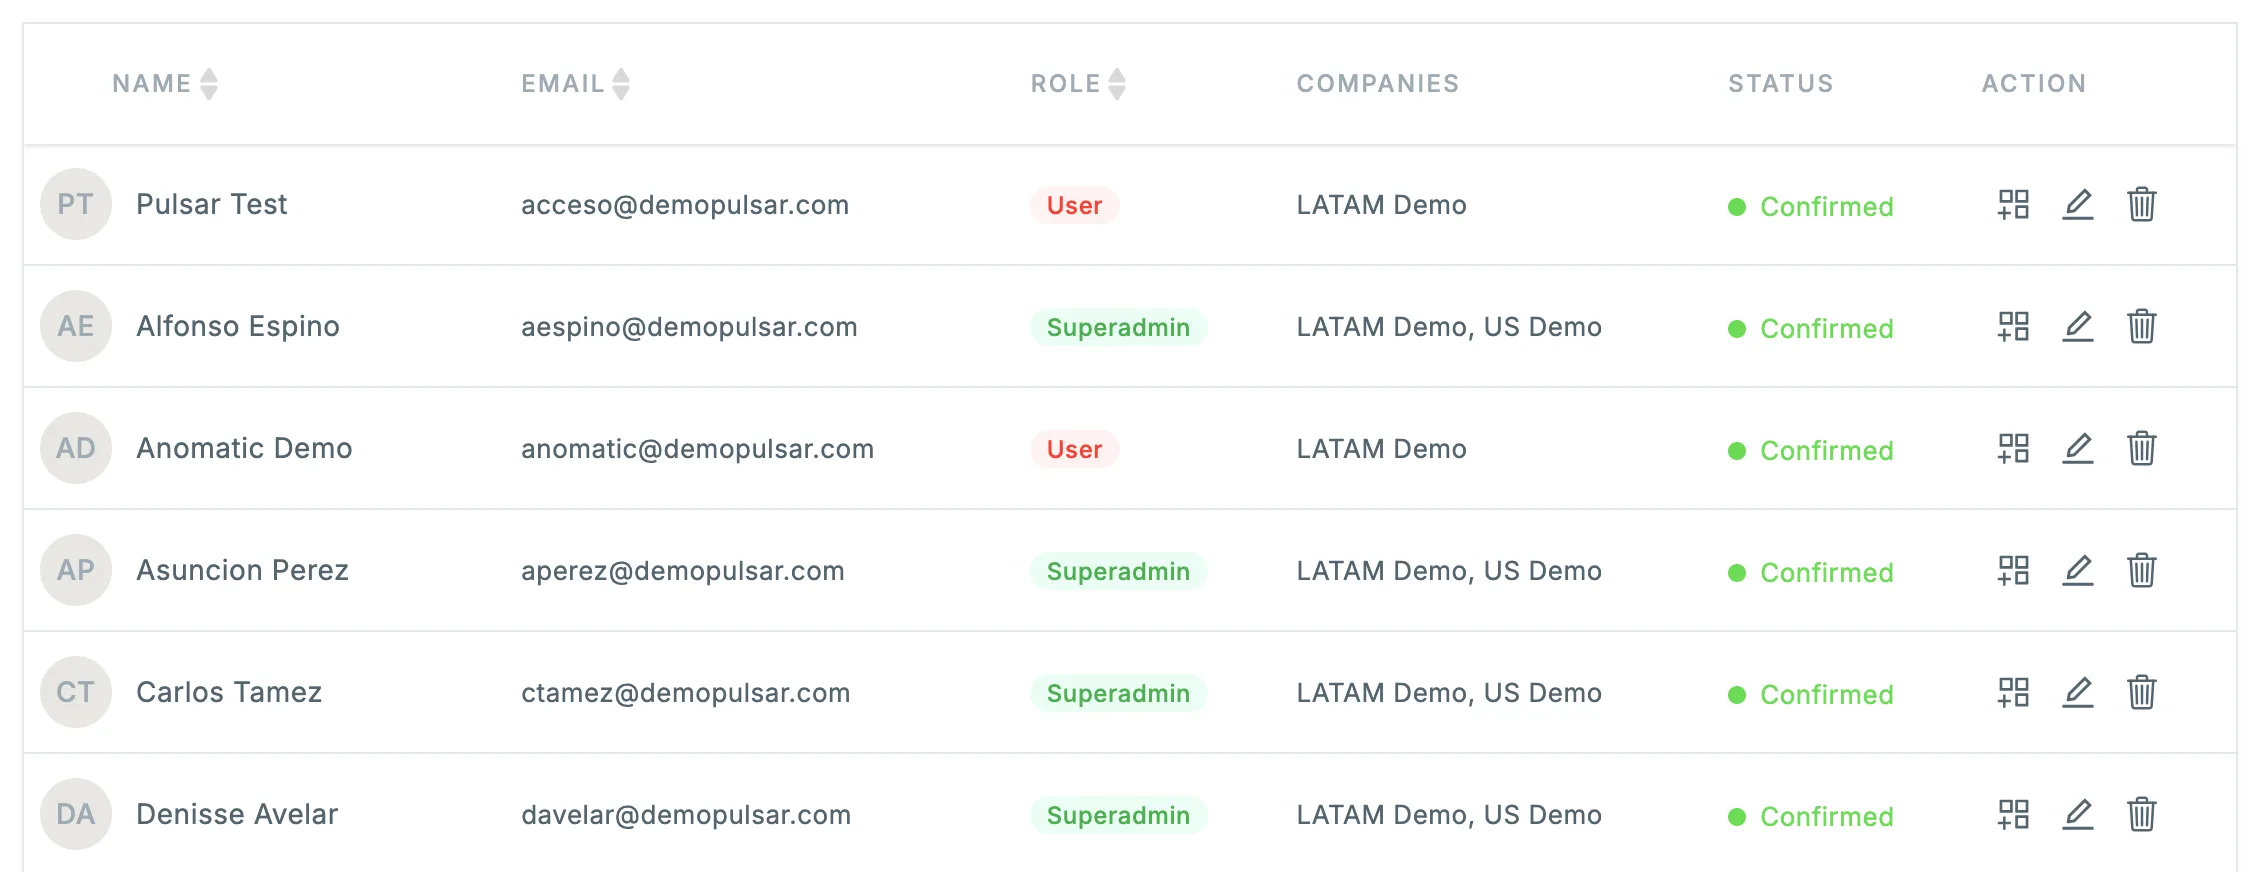
Go to Users Settings and click the machine group icon in the user's row (the first icon in the ACTION column).
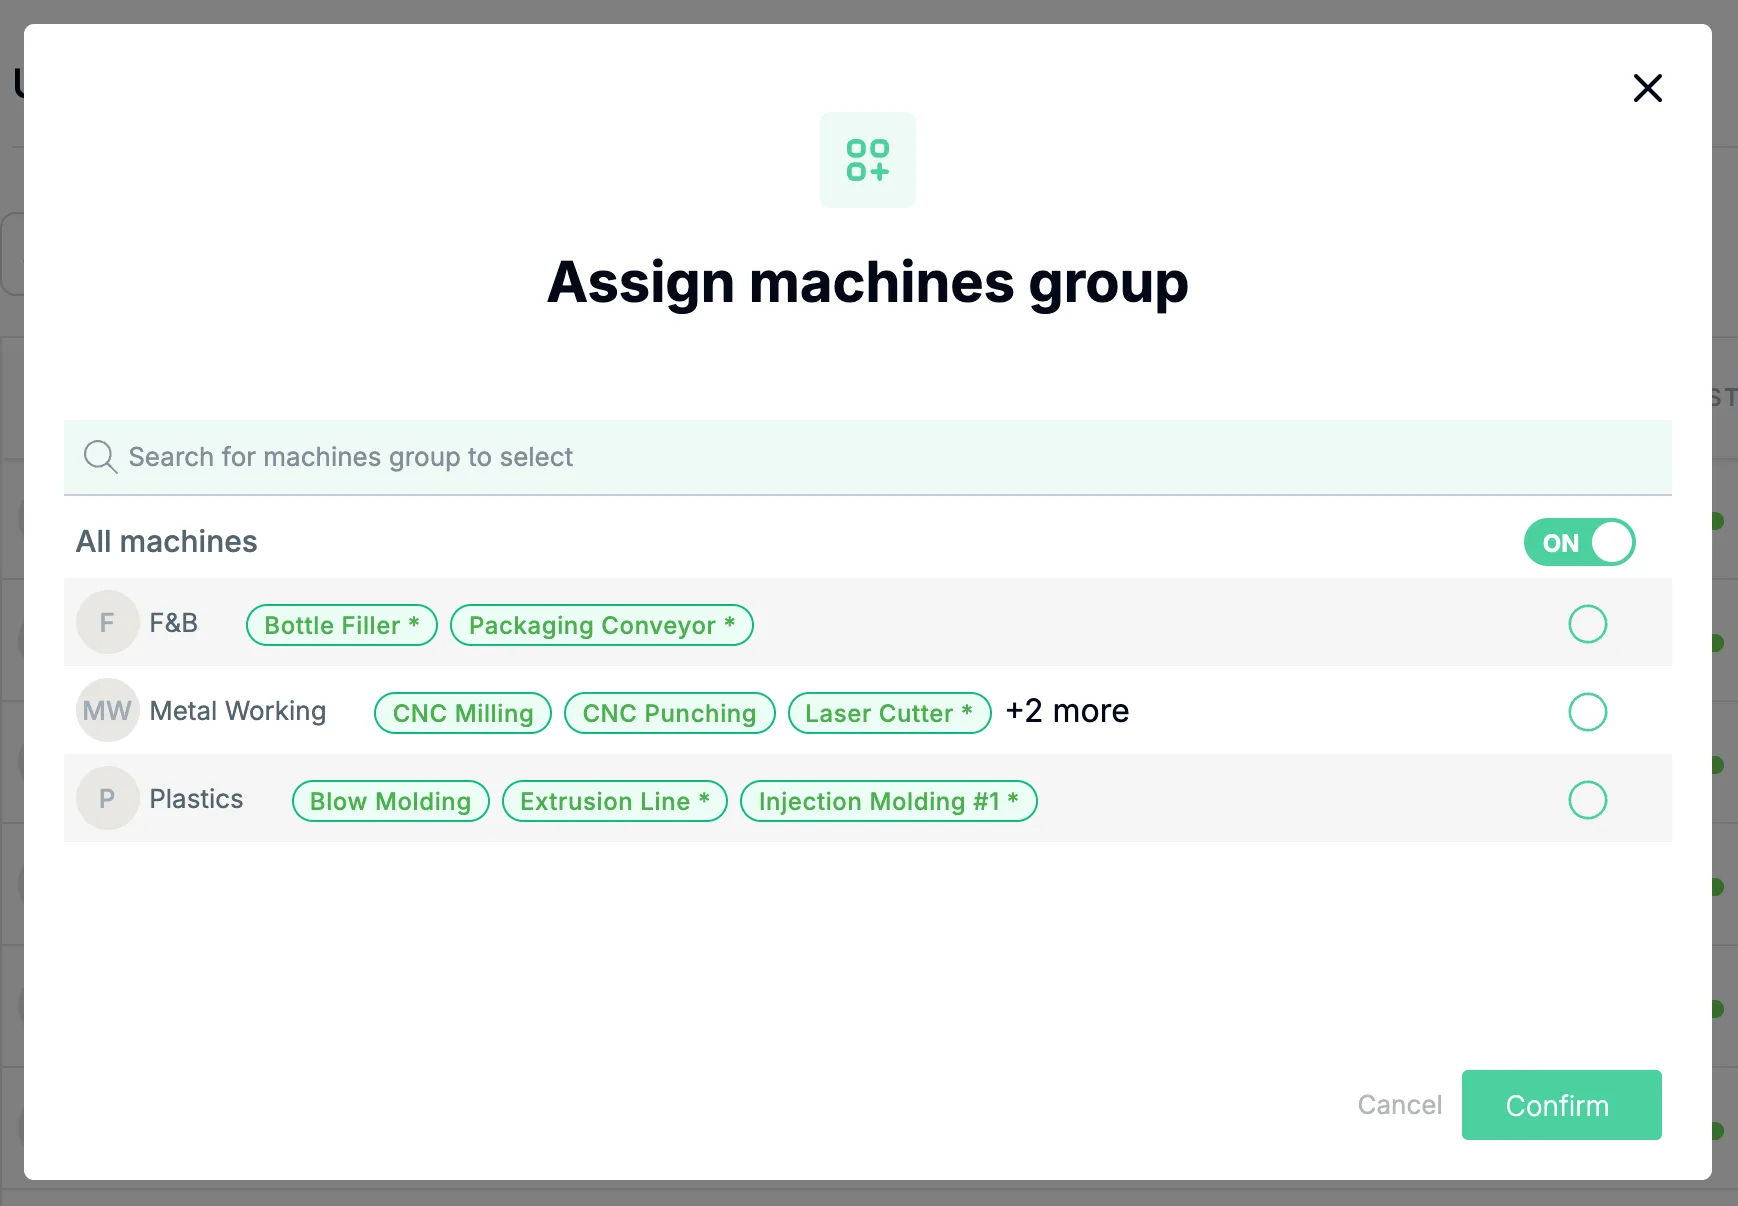
In Assign machines group, switch All machines to OFF, select the circle on the right of each group the user should see, and click Confirm.
If the user should see all machines, leave All machines on ON.
If you have trouble setting up machine groups or need help, contact your Customer Success representative or raise a support ticket from the app.