Real time metrics
Choose and order the metrics each machine card shows in Real Time and TV Mode, for every user or just for you.
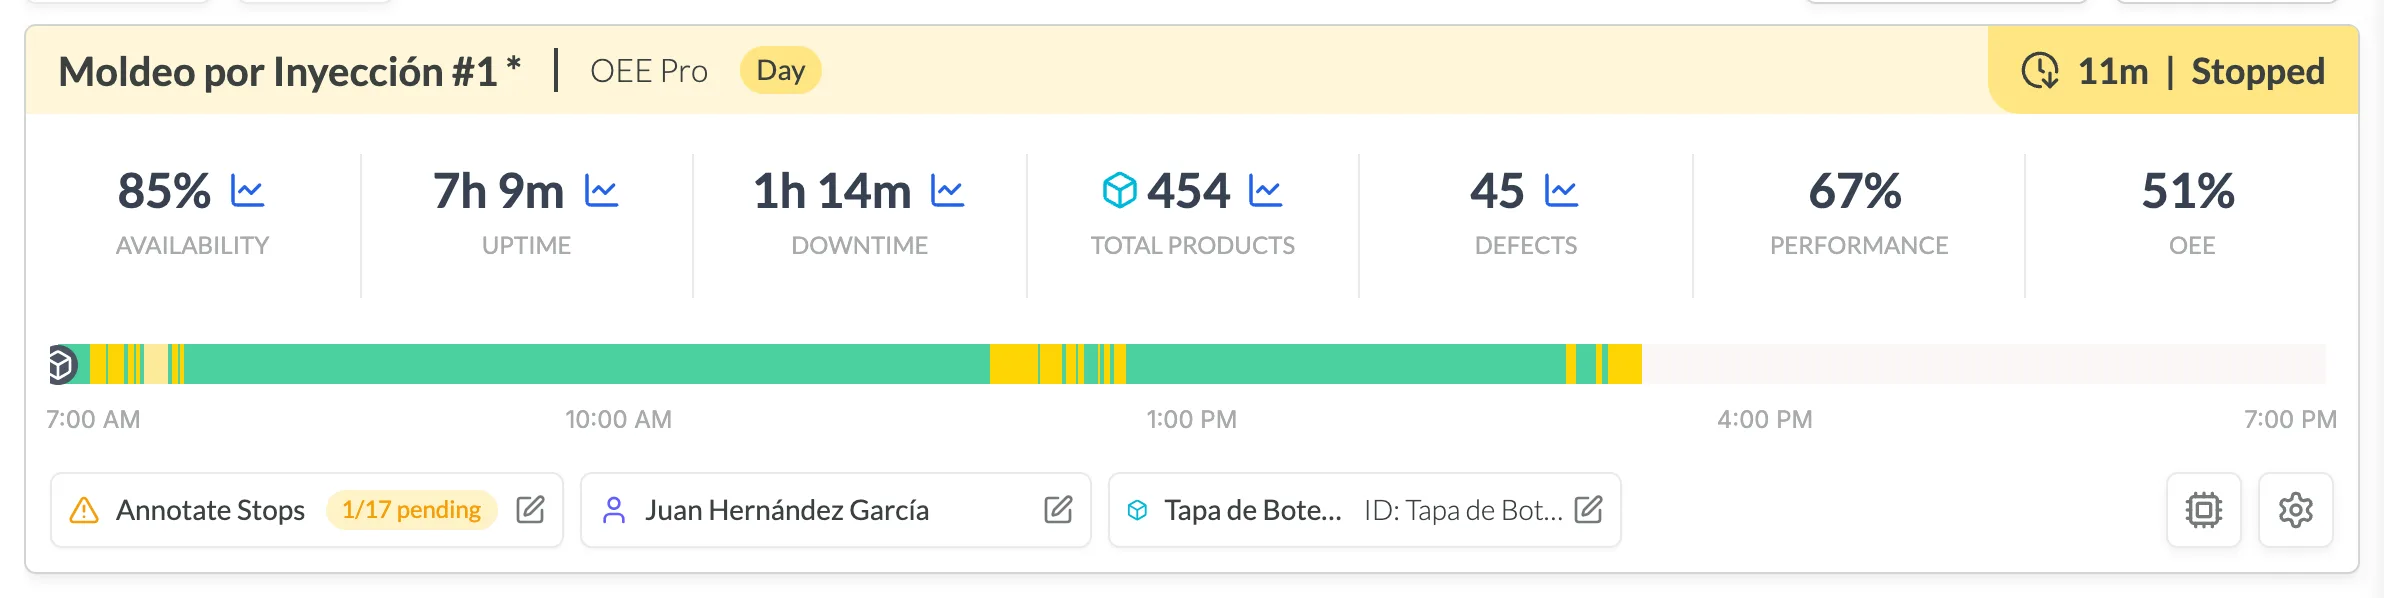
Pulsar shows productivity indicators that help you find areas of opportunity in your production lines. You choose which metrics each machine shows in Real Time Settings: open Settings > Real Time, or click the gear button at the bottom right of a machine's card in Real Time, which opens the same screen with that machine already selected.
Video
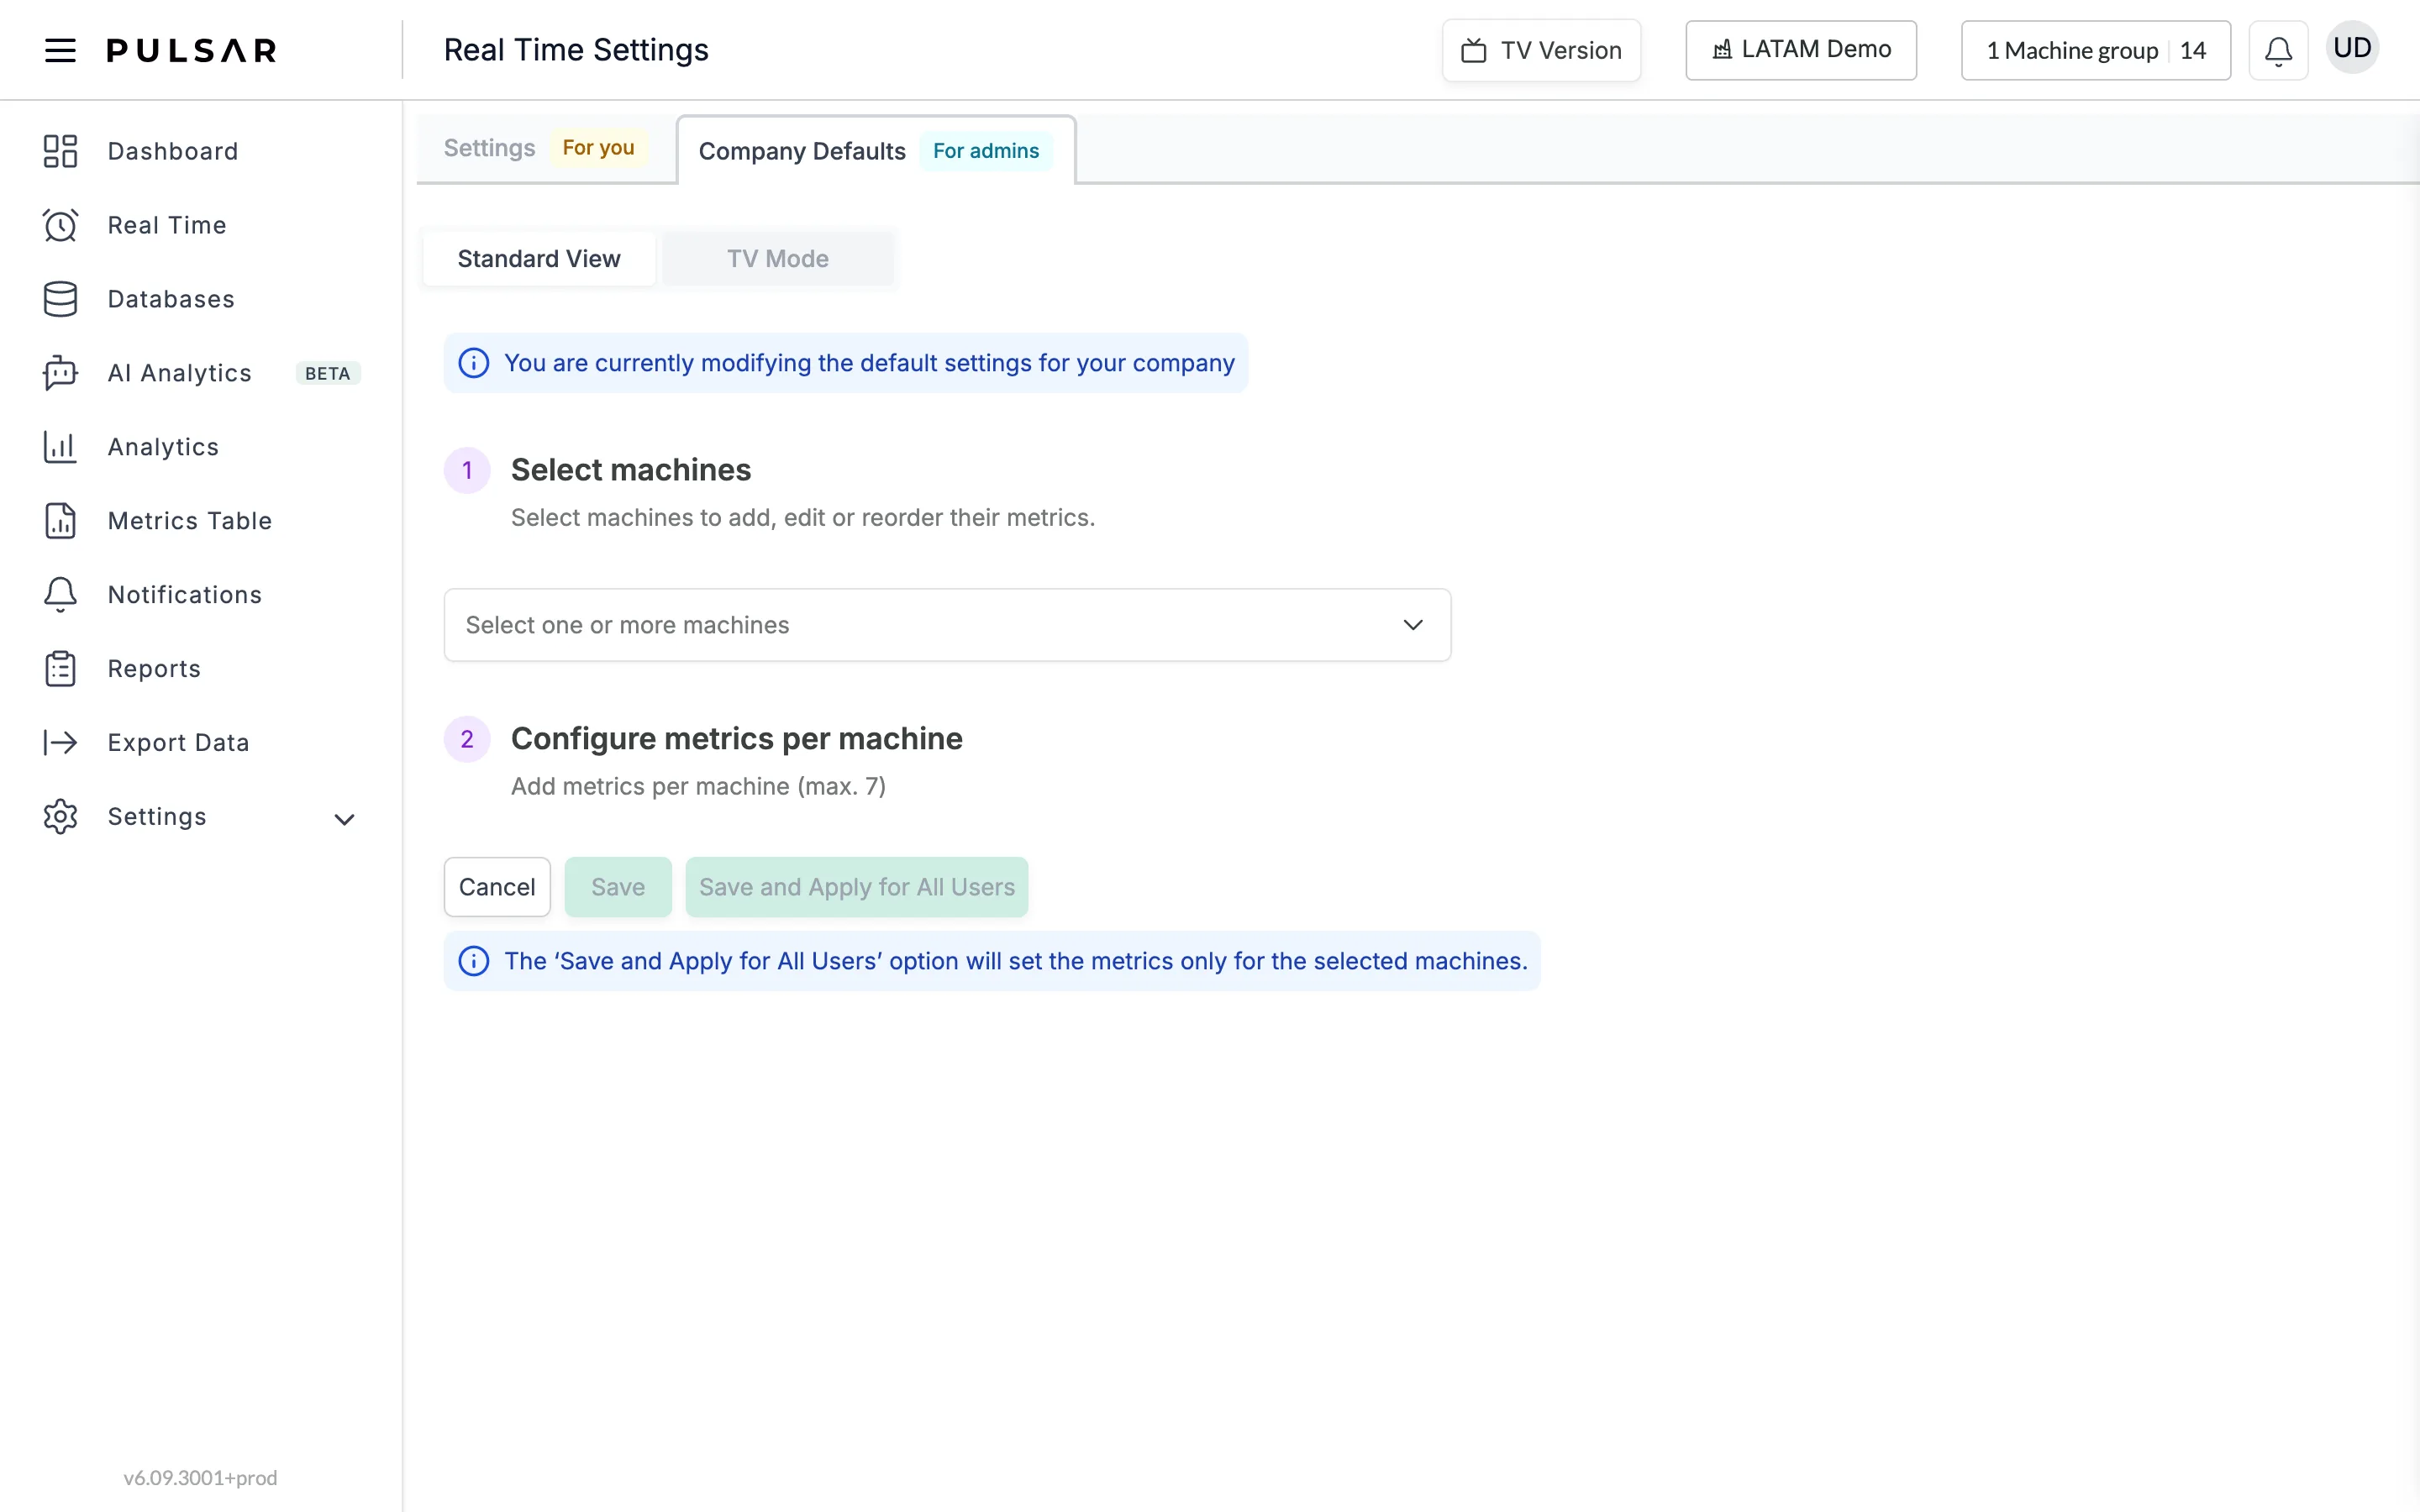
Real Time Settings has two tabs, Settings (marked For you) and Company Defaults (marked For admins), and each one has two views: Standard View, for the Real Time page, and TV Mode, for the TV version.
Set the metrics for all users
If you're an Admin, you can define the metrics for all users. We recommend this option.
Open the Company Defaults tab, marked For admins, and choose Standard View. A notice reminds you that You are currently modifying the default settings for your company.
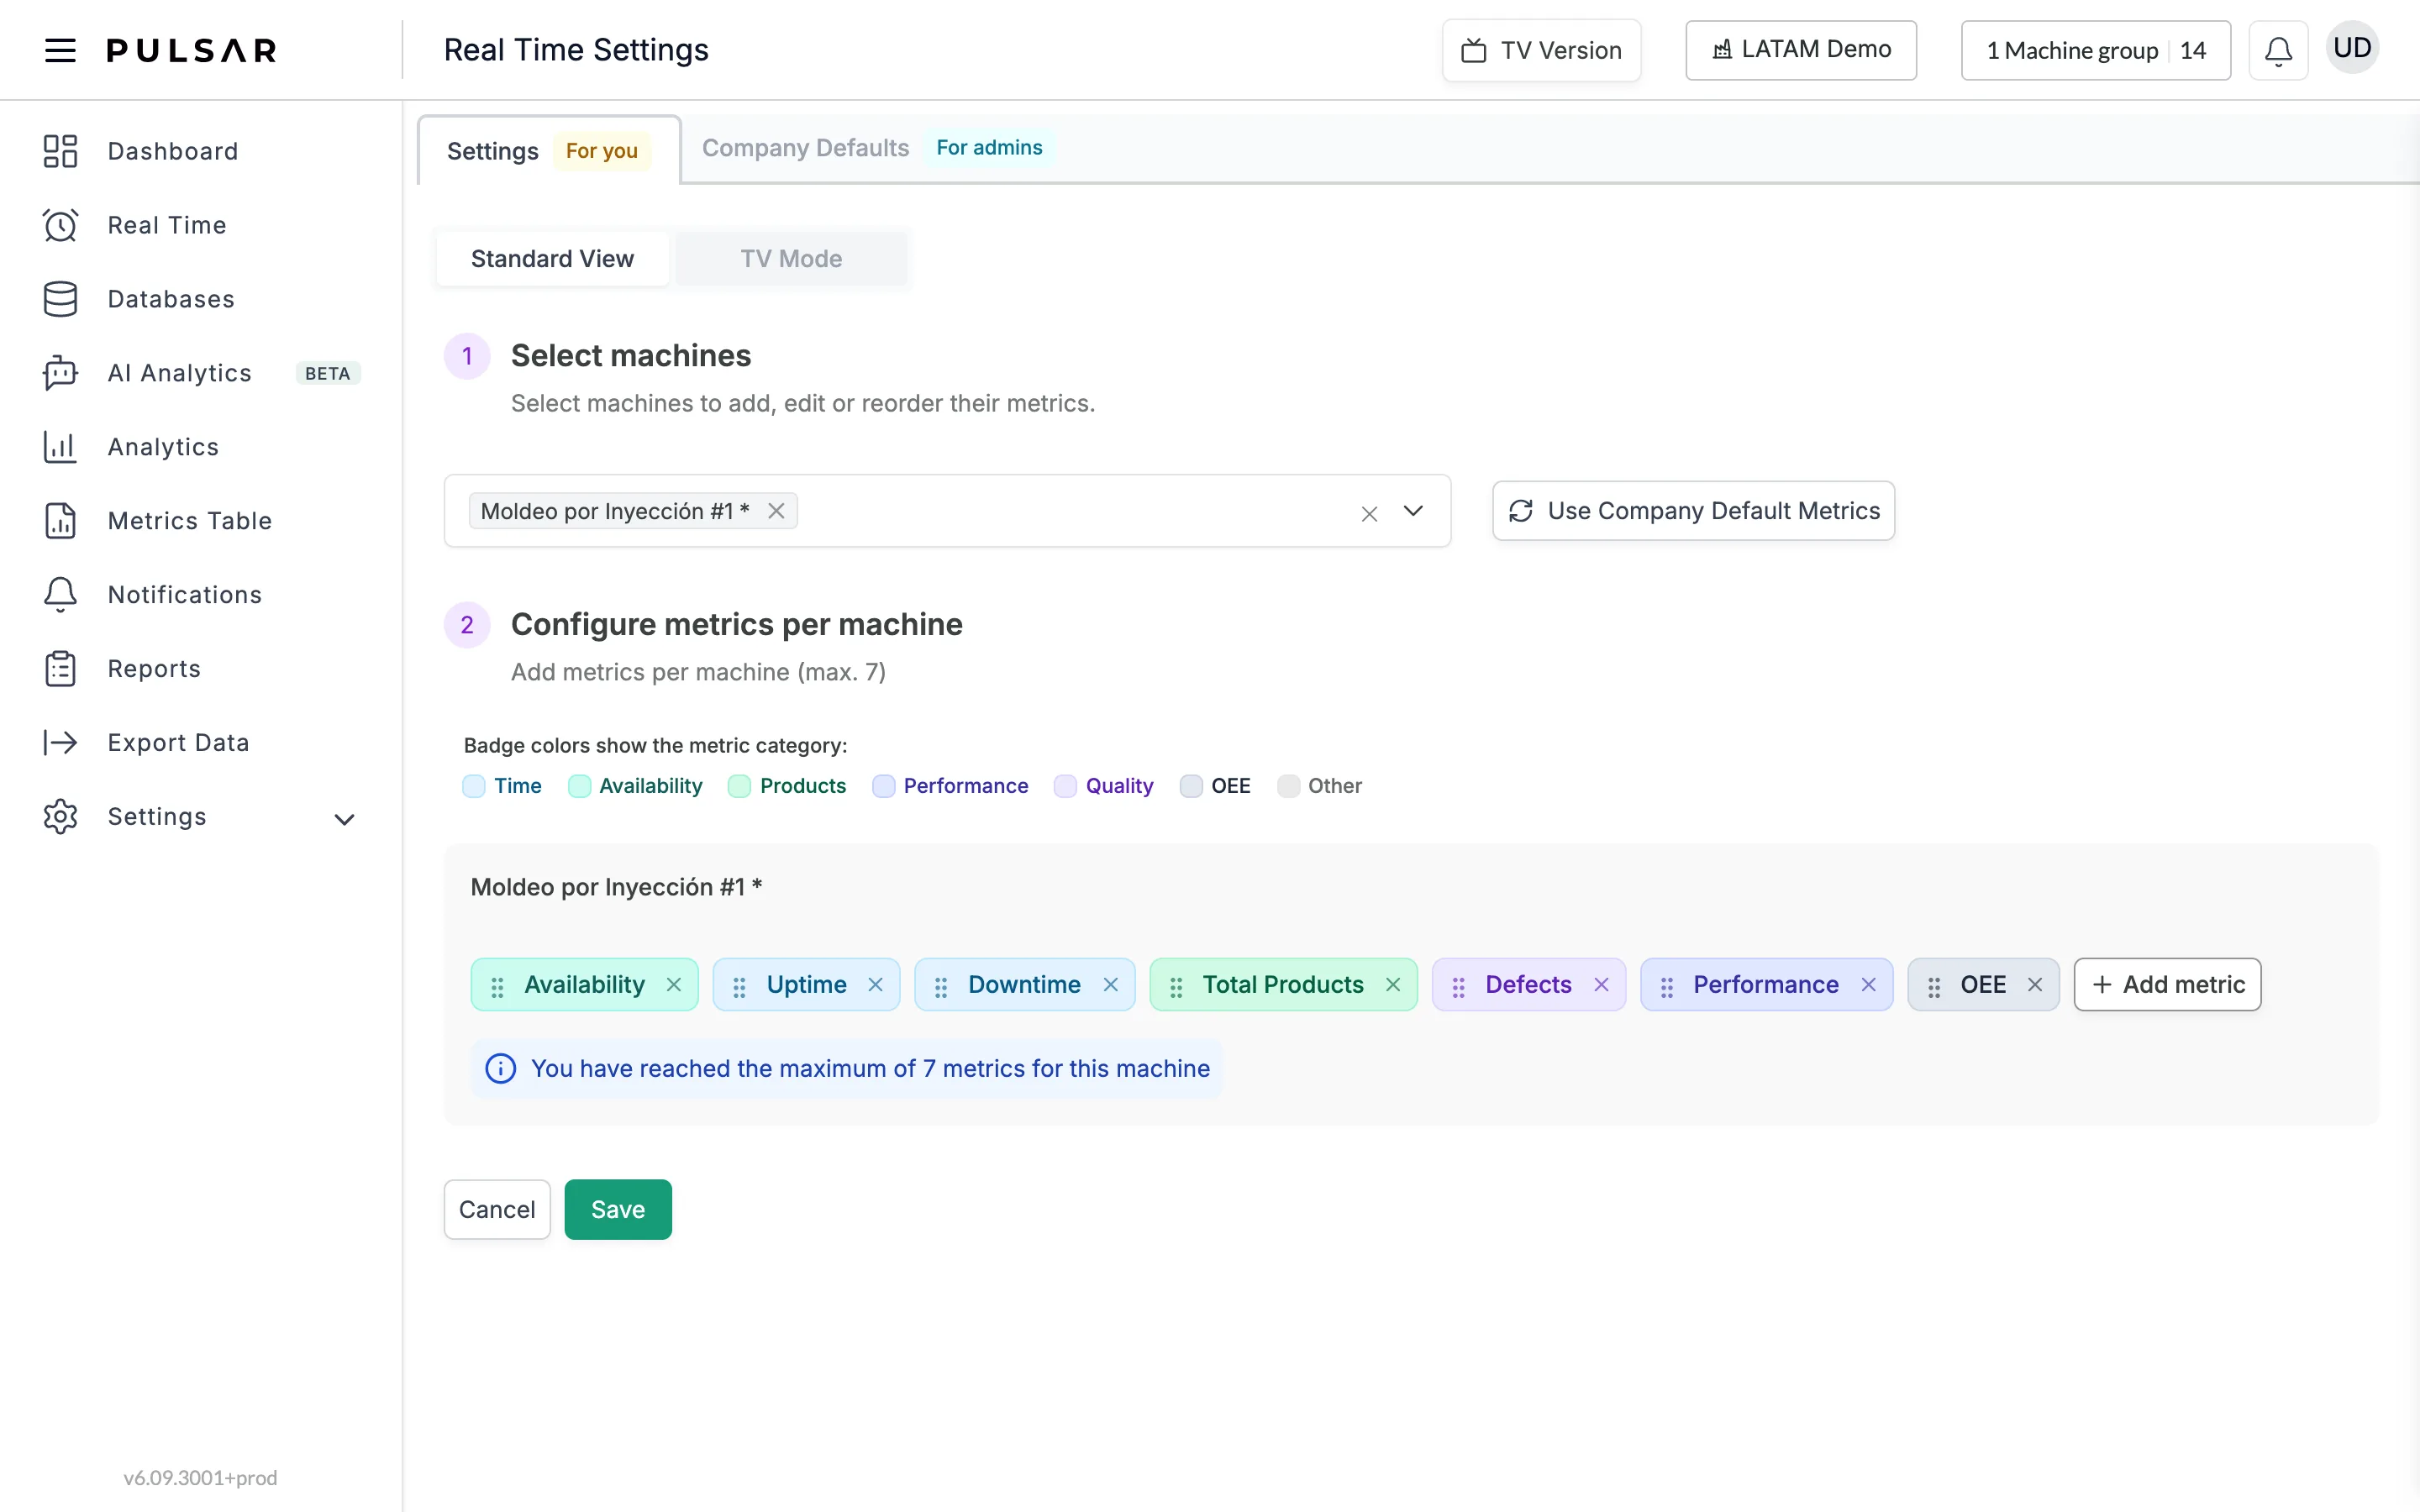
In Select machines, choose the machines whose metrics you want to add, edit or reorder, or choose All machines.
In Configure metrics per machine, set the metrics of each machine, up to 7:
- Click Add metric to add one.
- Click the x on a metric to remove it.
- Drag a metric by its handle to change its order.
The badge colors show each metric's category: Time, Availability, Products, Performance, Quality, OEE and Other. When a machine has 7 metrics, the message You have reached the maximum of 7 metrics for this machine appears.
Click Save and Apply for All Users. This sets the metrics only for the selected machines.
Set the metrics just for you
To adjust the Real Time metrics only for yourself, open the Settings tab, marked For you, and follow the same steps 1 and 2 to personalize your Real Time KPIs. Click Save when you finish. To go back to your company's metrics for the selected machines, click Use Company Default Metrics.
This setting is done machine by machine. Don't forget to click Save when you finish.
Set up TV Mode
The TV Mode view of each tab sets up the TV version in the same way, for you or (on Company Defaults) for all users:
- The view: Single machine view, Tower Control Machine View or Tower Control Operator View.
- Slide transition time (15 seconds, 30 seconds or 60 seconds), Hide out-of-shift machines, and Status time (Elapsed time, Time of the change or Both).
- Choose layout configuration (2x2, 3x3, 6x2 or 8x4) and Card information (Show operator, Show SKU, Show SKU description, and the Stop cause: Hidden, General, General + specific or Specific). Those card options are for the 2x2 layout; the larger layouts show less.
- Select machines and Configure metrics per machine, as in Standard View, but with up to 4 metrics per machine in 2x2, 2 in 3x3, and none in 6x2 and 8x4. TV mode covers every view and layout.
On Company Defaults, Save and Apply for All Users sets the metrics only for the selected machines. If no machines are selected, it applies only the TV layout setting.
For a full description of the TV layouts and card options, see TV mode. If you have trouble configuring the metrics or need help, contact your Customer Success representative or raise a support ticket from the app.