Stop automation
Create rules that classify stops automatically, based on how long they last and when they usually happen.
You can create rules that classify machine stops automatically: stops under 5 minutes, lunch breaks, cleaning, setup, machine preparation and much more. Go to Settings > Stops, open the Stop Automation tab and start creating your own rules. The Stop Triggers list shows the rules you've already created.
Video
Create an automation
Click New Automated Stop Trigger. Fill in the Create New Automated Stop Trigger window in this order.
Name it and select the machines
Type a clear name in Trigger Name, for example Lunch – AM. Then, in Assign Machines, open Select machines, tick the machines the rule applies to and apply your selection.
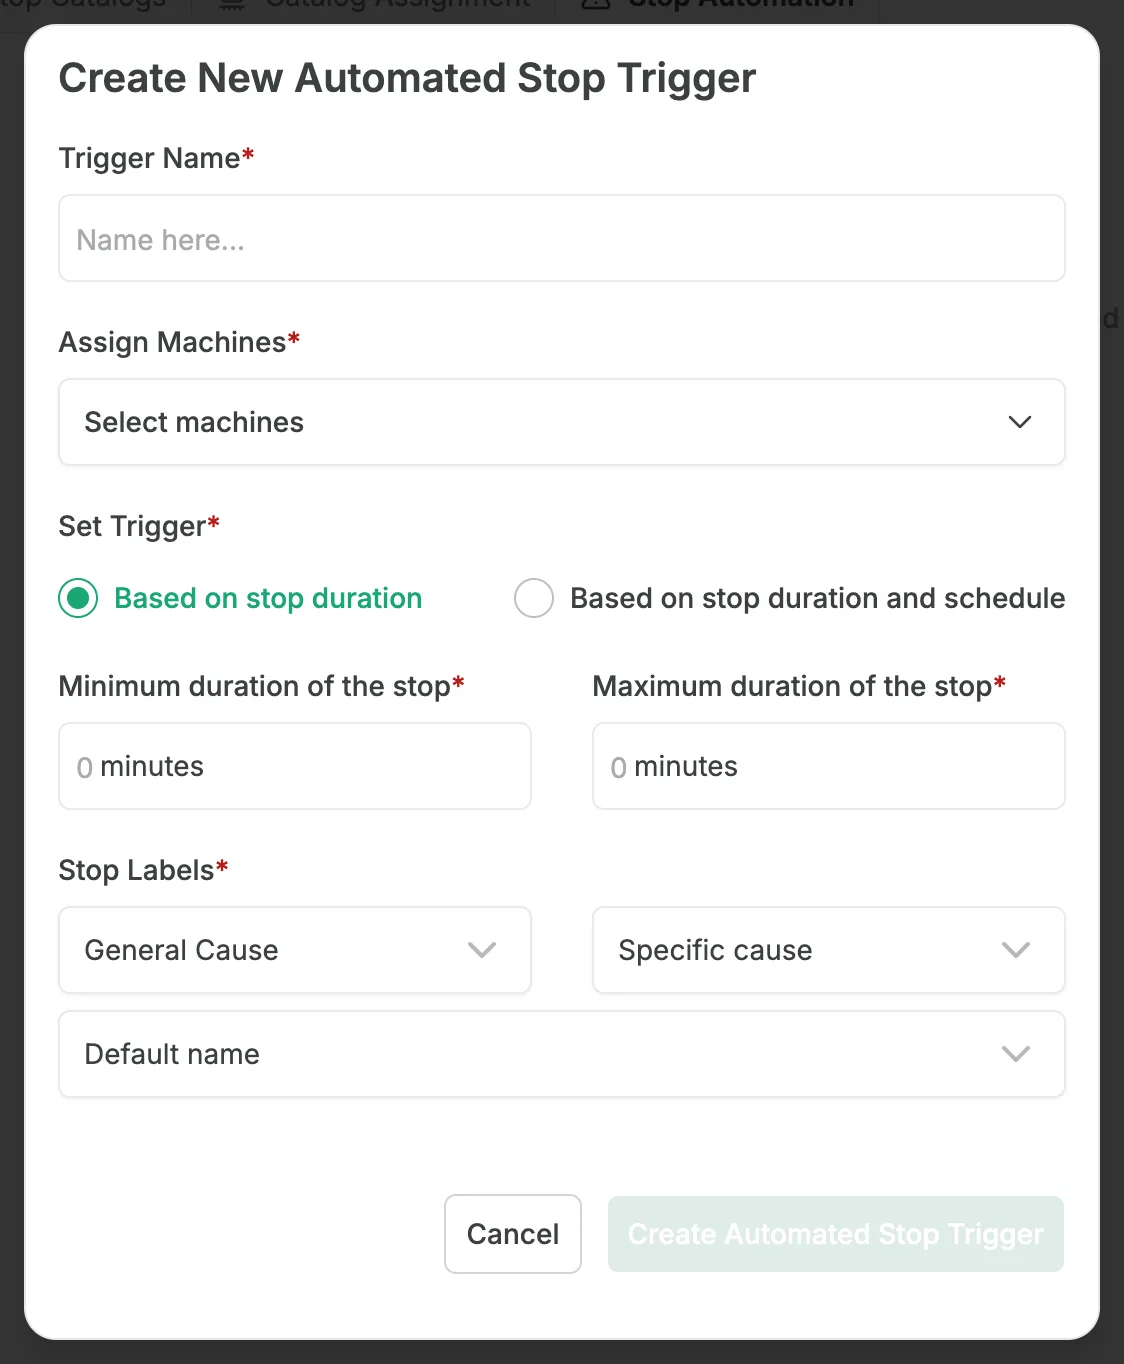
Create a trigger
In Set Trigger, choose what the rule is based on:
- Based on stop duration: enter the Minimum duration of the stop and the Maximum duration of the stop, in minutes.
- Based on stop duration and schedule: enter the same minimum and maximum duration, then choose the Days the stop happens (Mo to Su, all ticked at first) and the time window in which it usually starts, with Stop start (from) and Stop start (to) (hour, minutes and AM or PM).
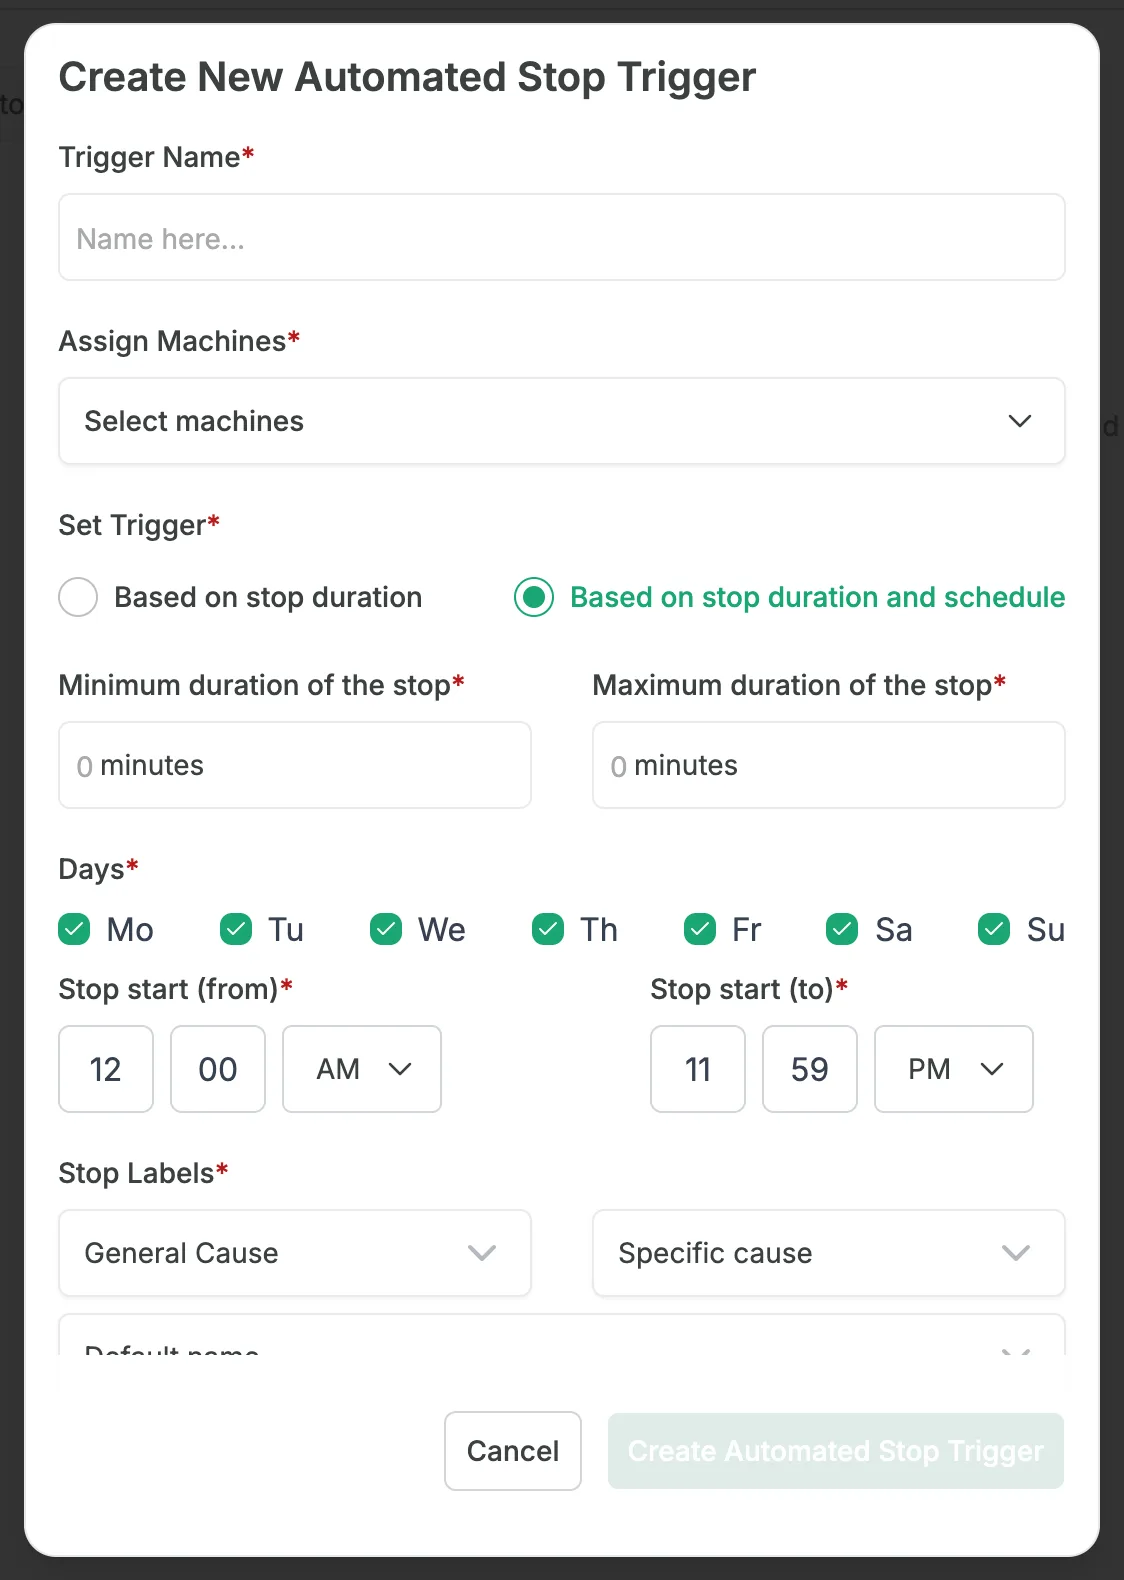
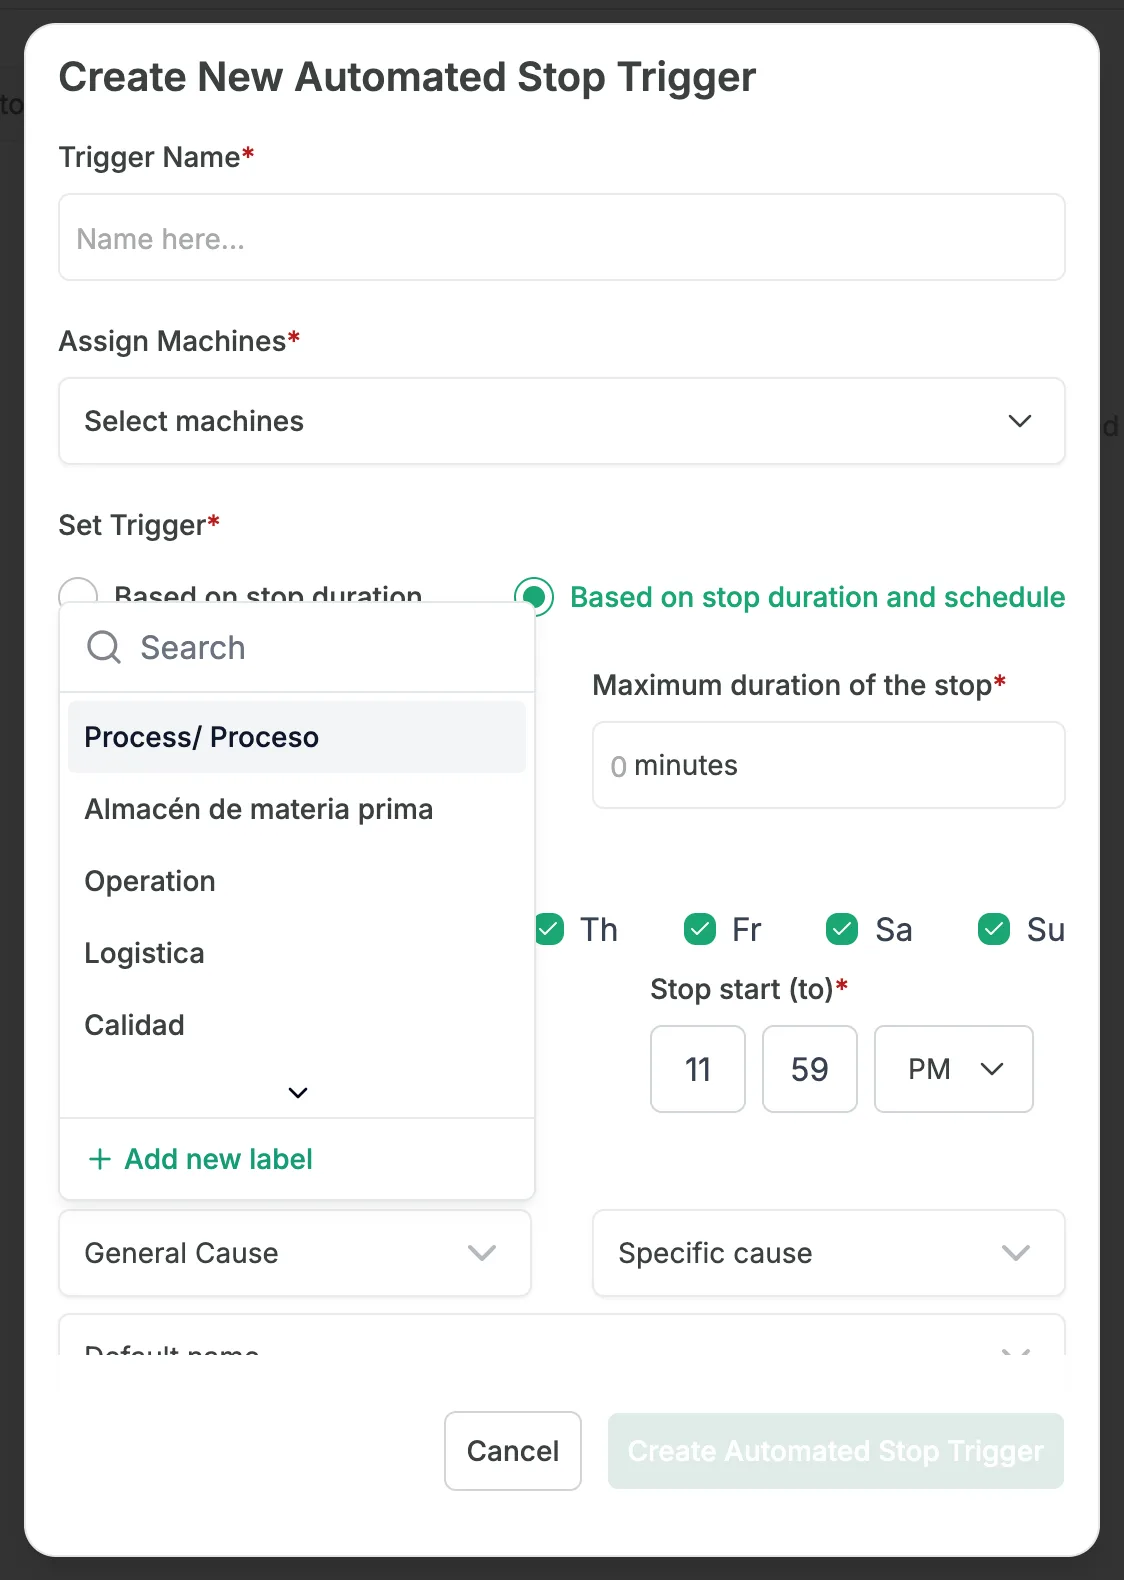
Assign the stop causes
Under Stop Labels, choose the General Cause and Specific cause from your stop catalog, and a value of the additional stop label in the third drop-down, which carries that label's name (Default name until you rename it). Each drop-down has a search box. If you need a new label for this cause, create it in the stop labels or directly here with Add new label at the bottom of the drop-down.
Create it
Click Create Automated Stop Trigger.
The automation is created and appears in Stop Triggers, where you can edit it at any time. There is no limit to the number of automations you can create.
If you have trouble setting up stop automation or need help, contact your Customer Success representative or raise a support ticket from the app.